.png)
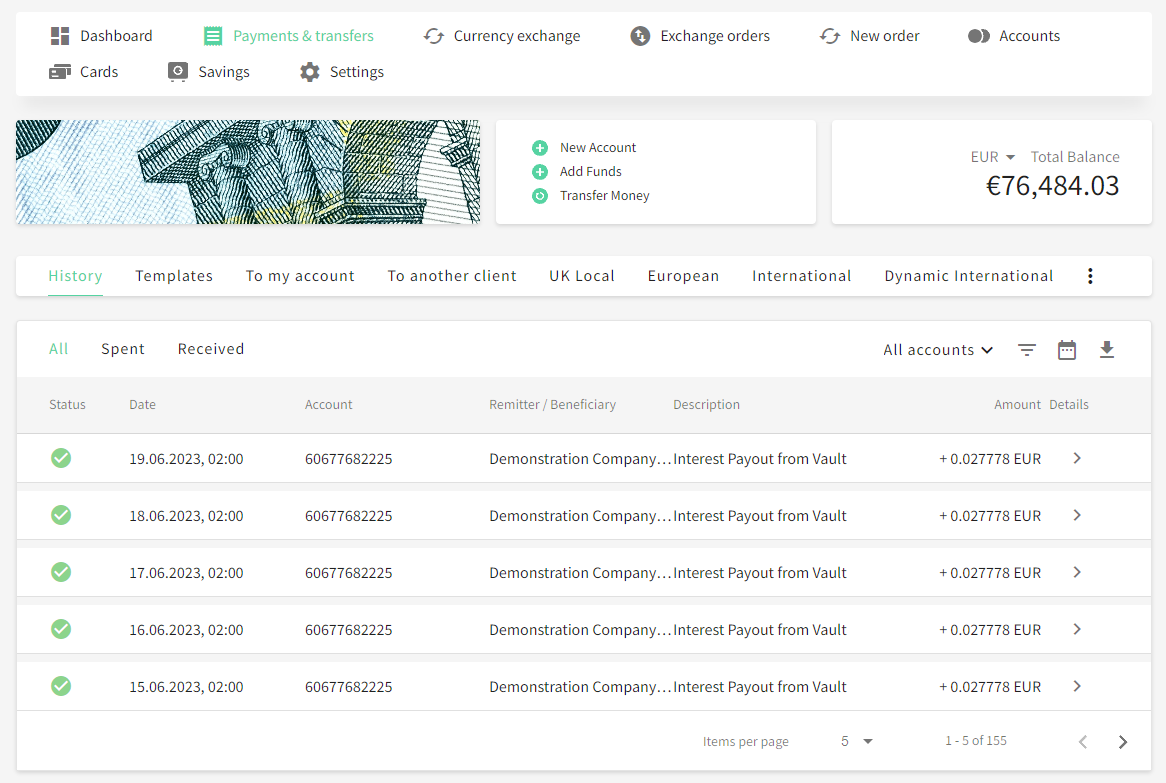
Being a fully functioning Banking instrument, the Web Interface delivers several ways to execute transfers. Navigate to Payments & Transfers or click Transfer money in the quick-access field to see all options provided by the functionality.
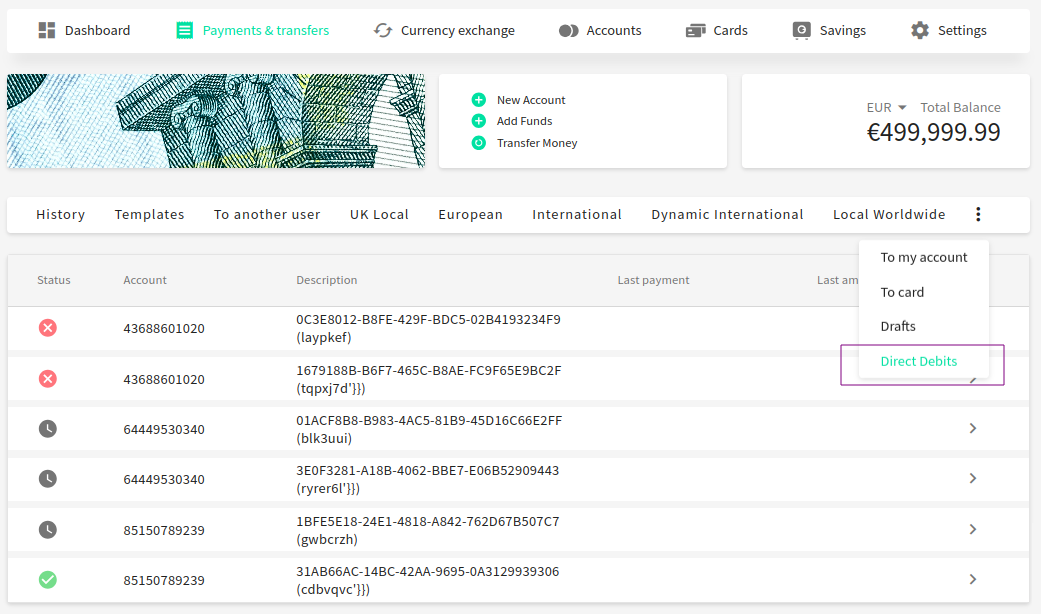
History
The tab allows user to browse all the transactions requested from their accounts. Navigate across the transactions and import the details using the actions above the list.
If a transaction is executed in cryptocurrency, any wallet address in the transactions list will be masked. It is possible to copy the whole wallet address as follows:
-
Point the mouse cursor over the masked address.
-
Click Copy.
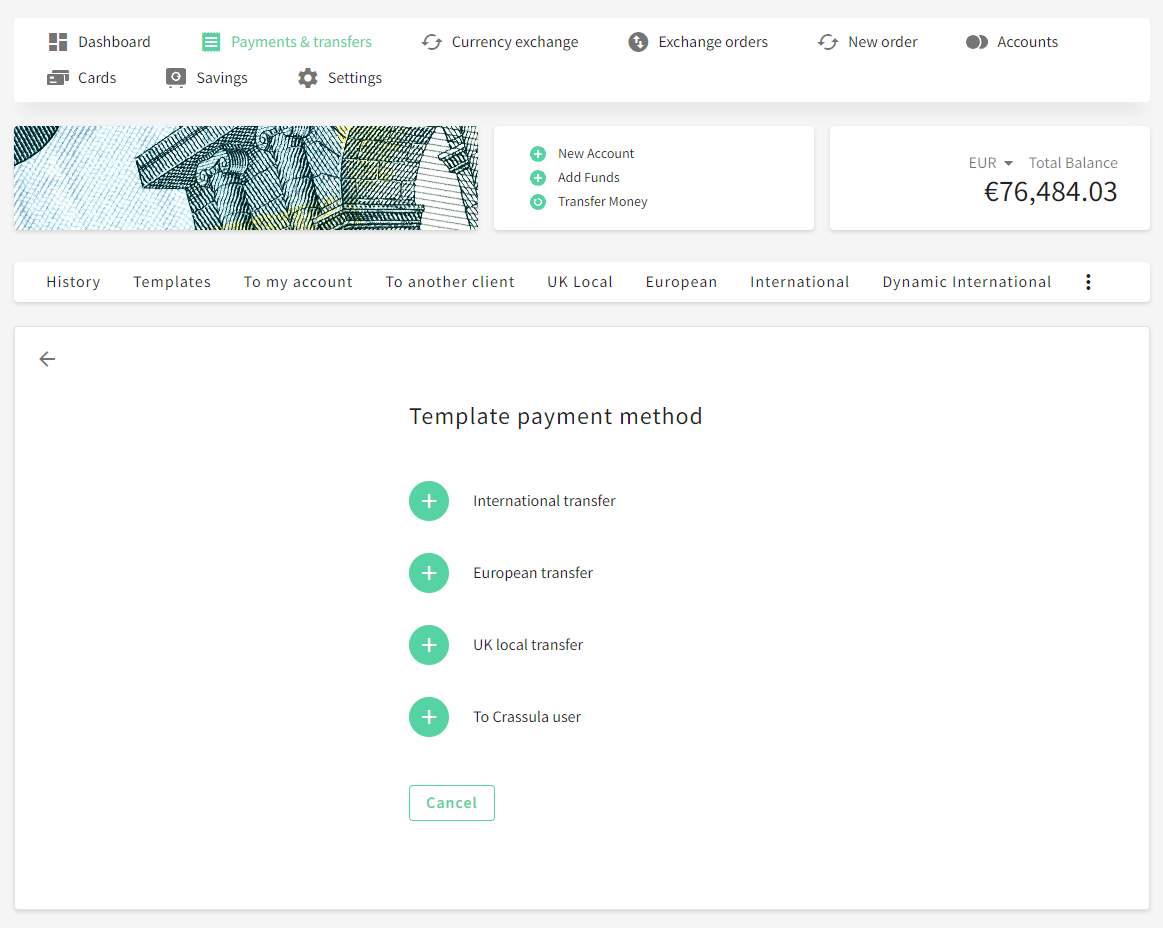
Templates
The tab delivers a solution for creating templates. The transfer template is a time-saving instrument that provides a way to execute recurrent transfers from a previously created template.
To create a transfer template
-
Navigate to the Templates tab.
-
Click Create template.
-
Select the template payment method:
-
International transfer
-
European transfer (SEPA)
-
UK local transfer
-
To another client
-
-
Select an account from the drop-down list to transfer funds from.
-
Enter the sum to transfer in the You send field.
-
Select a currency from the drop-down list.
-
Fill in the recipient details.
-
Add a description and set the name for the new template. The minimum number of symbols is 6.
-
Click Save to confirm the changes.
-
The new template will be available in the Templates tab.
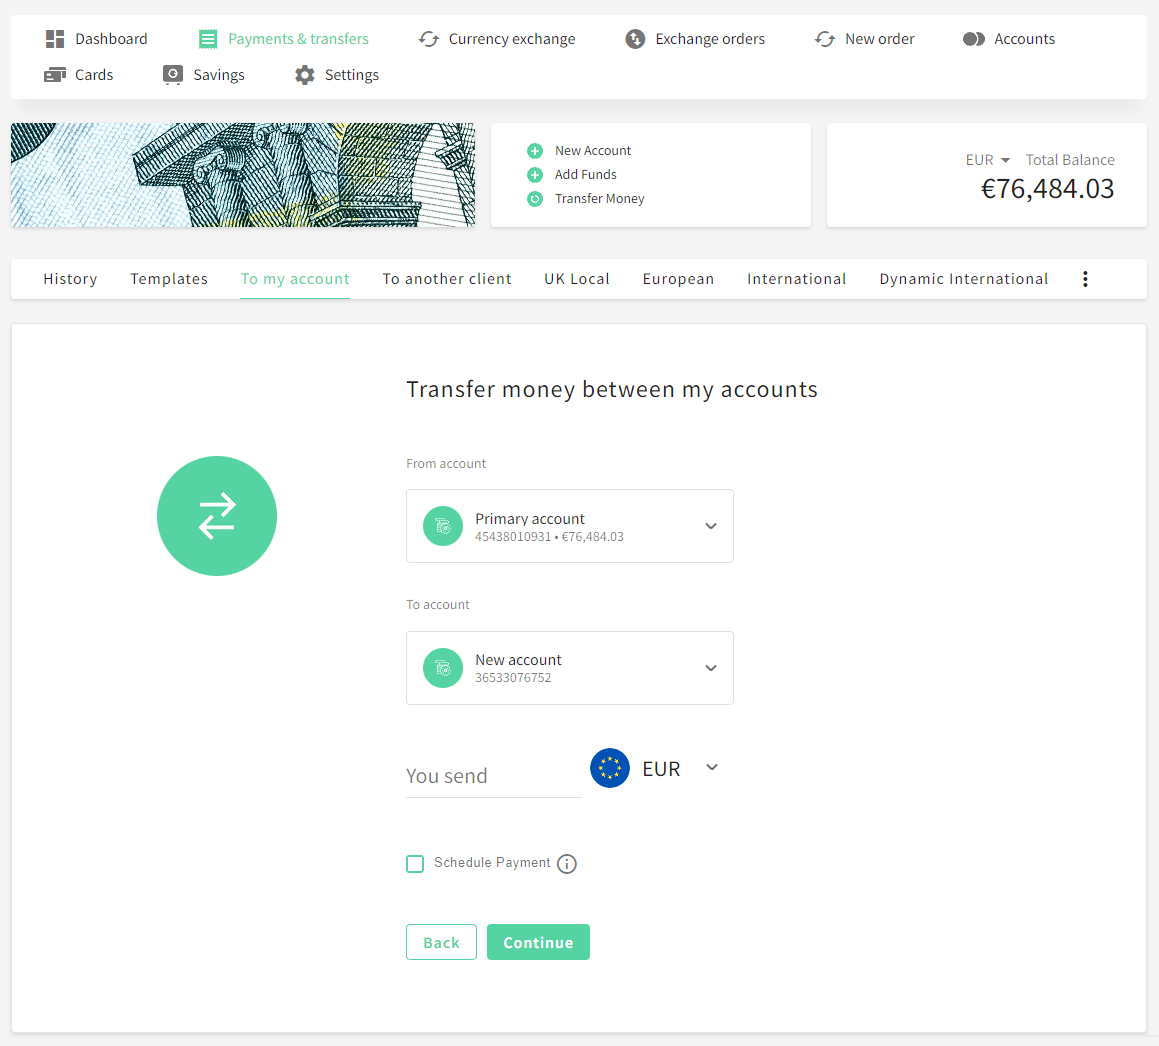
To my account
The tab allows the user to transfer funds between their accounts.
To create a transfer between accounts
-
Navigate to the To my account tab.
-
Select an account from the From account drop-down list to transfer funds from.
-
Select an account from the To account drop-down list to transfer funds to.
-
Enter the sum to transfer in the You send field.
-
Select a currency from the drop-down list.
-
Set the Schedule payment checkbox to create a recurring payment.
-
Click Save to confirm the changes.
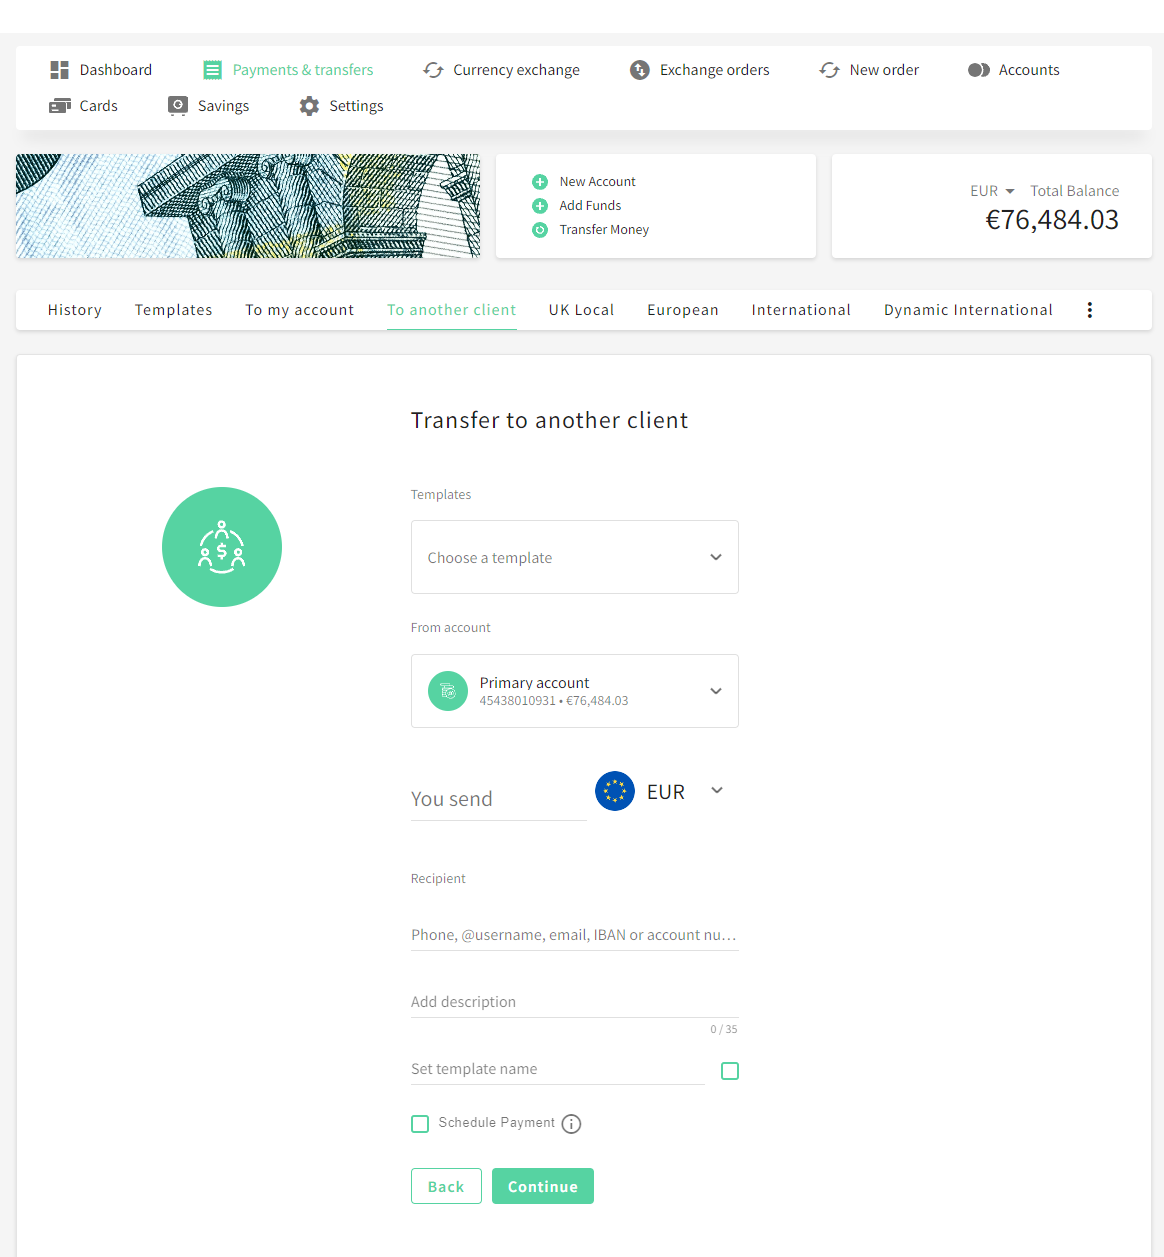
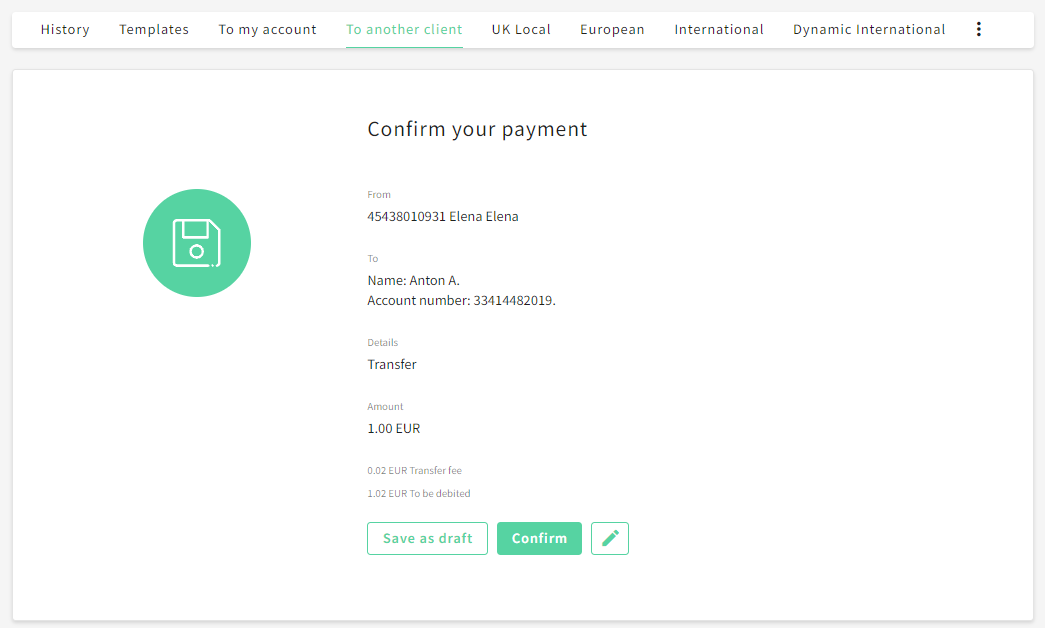
To another client
The tab allows the user to execute an internal transfer to a client within the same financial service. You can make payments to an existing <White Label> client using their e-mail, phone number, or @username instead of account details.
To create a transfer to another client
-
Navigate to the To another client tab.
-
Select an account from the From account drop-down list to transfer funds from.
-
Enter the sum to transfer in the You send field.
-
Select a currency from the drop-down list.
-
Define one of the following recipient details:
-
E-mail
-
Phone number
-
@username
-
Account number
-
IBAN
-
-
Add a payment description to define its purpose. The minimum number of symbols is 6.
-
Set the Schedule payment checkbox to create a recurring payment.
-
Set the Set template name checkbox to save the transfer details as a template.
-
Click Save to confirm the changes.
Select a template from the Choose a template drop-down list, if one is present, to import the previously saved transfer details.
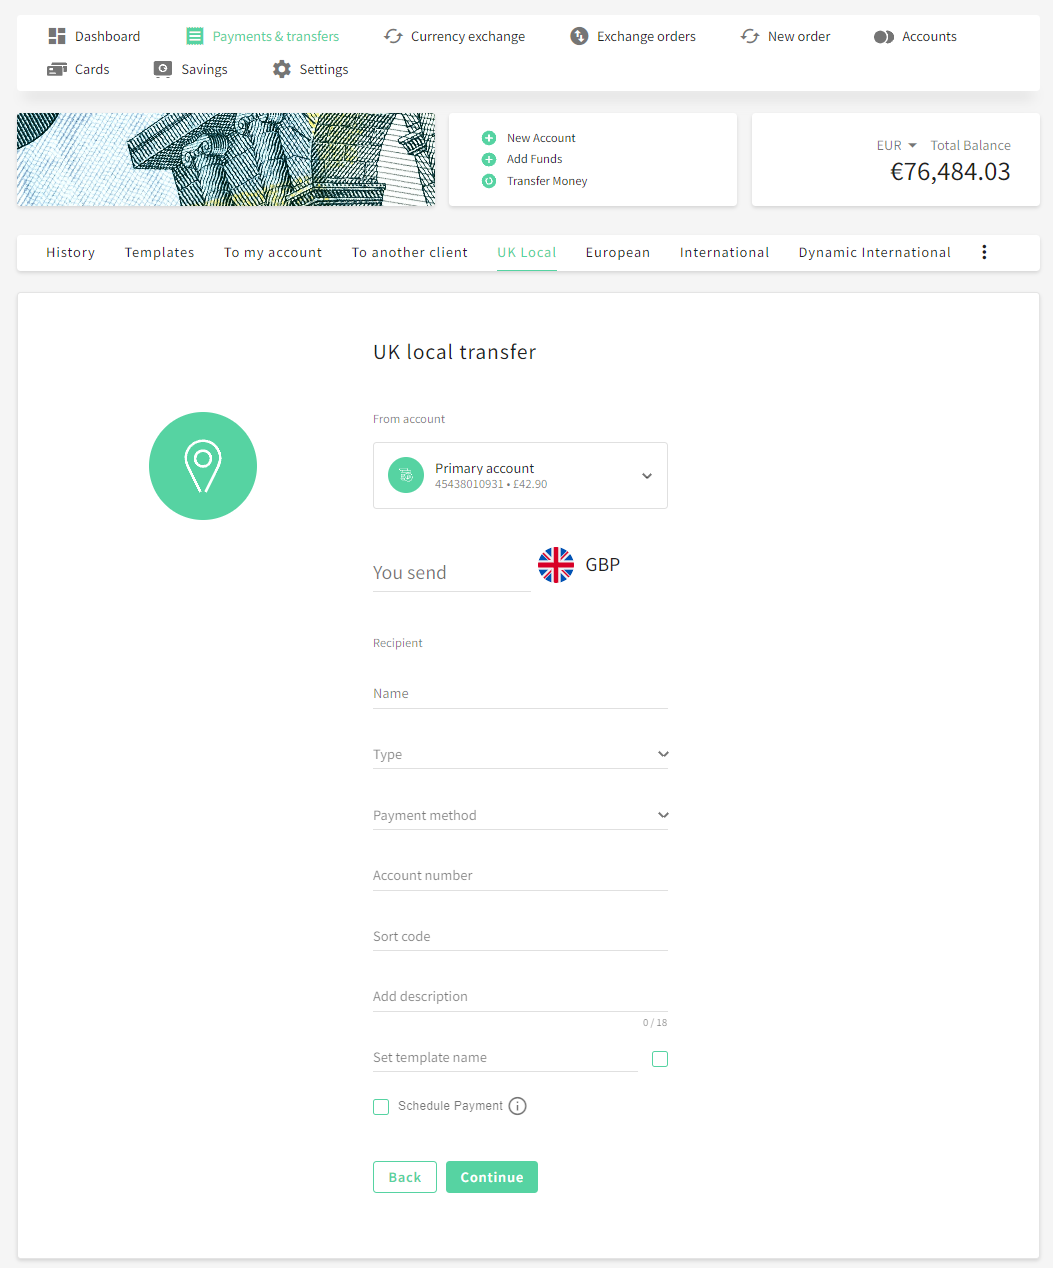
UK Local
The tab allows the user to execute a transfer inside the United Kingdom. The transfer requires general account details, such as the recipient’s name, account number, and sort code.
To create a UK local transfer
-
Navigate to the UK local tab.
-
Select an account from the From account drop-down list to transfer funds from.
-
Enter the sum to transfer in the You send field.
-
Select a currency from the drop-down list.
-
Define the following recipient details:
-
Fill in the beneficiary name in the Name field.
-
Select a beneficiary type in the Type field.
-
Select one of the Payment methods: FPS or CHAPS.
-
Account details: the account number and sort code.
-
-
Add a payment description to define its purpose. The minimum number of symbols is 6.
-
Set the Schedule payment checkbox to create a recurring payment.
-
Set the Set template name checkbox to save the transfer details as a template.
-
Click Save to confirm the changes.
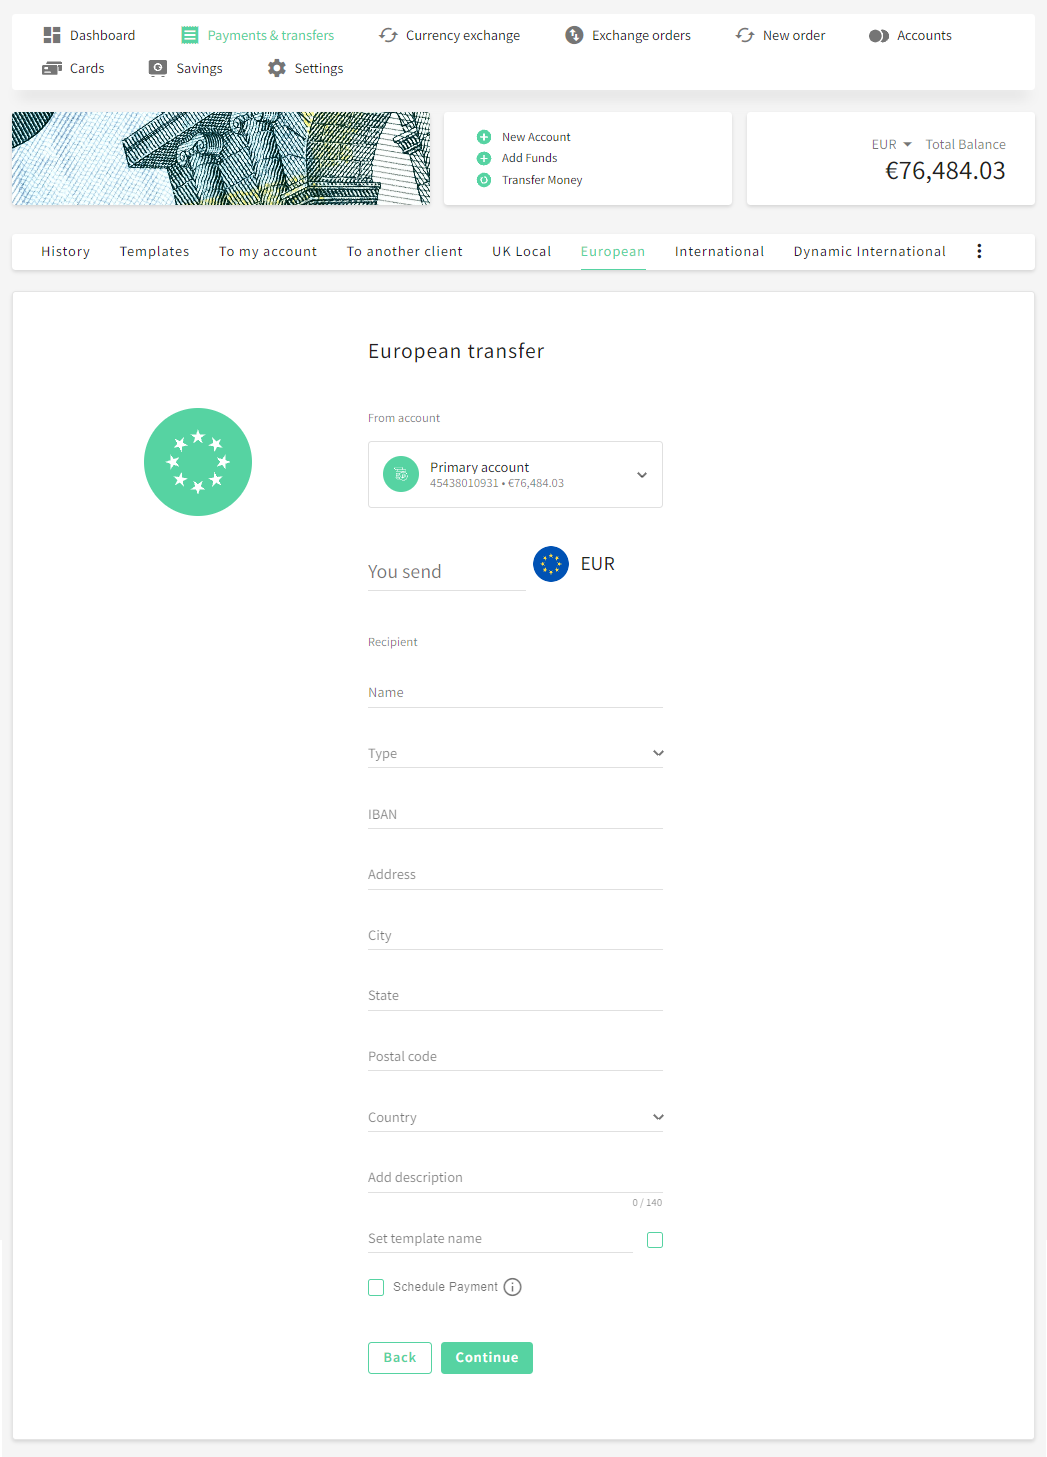
European (SEPA)
The tab allows the user to execute a transfer to a country inside the European Union. The transfer requires an extended list of account details, such as the recipient’s name, IBAN, and legal address.
To create a European transfer
-
Navigate to the European tab.
-
Select an account from the From account drop-down list to transfer funds from.
-
Enter the sum to transfer in the You send field.
-
Select a currency from the drop-down list.
-
Define the following recipient details:
-
Fill in the beneficiary name in the Name field.
-
Select a beneficiary type in the Type field.
-
Beneficiary address details: Address, city, state (if applicable), postal code, and country.
-
Account details: IBAN.
-
-
Add a payment description to define its purpose. The minimum number of symbols is 6.
-
Set the Schedule payment checkbox to create a recurring payment.
-
Set the Set template name checkbox to save the transfer details as a template.
-
Click Save to confirm the changes.
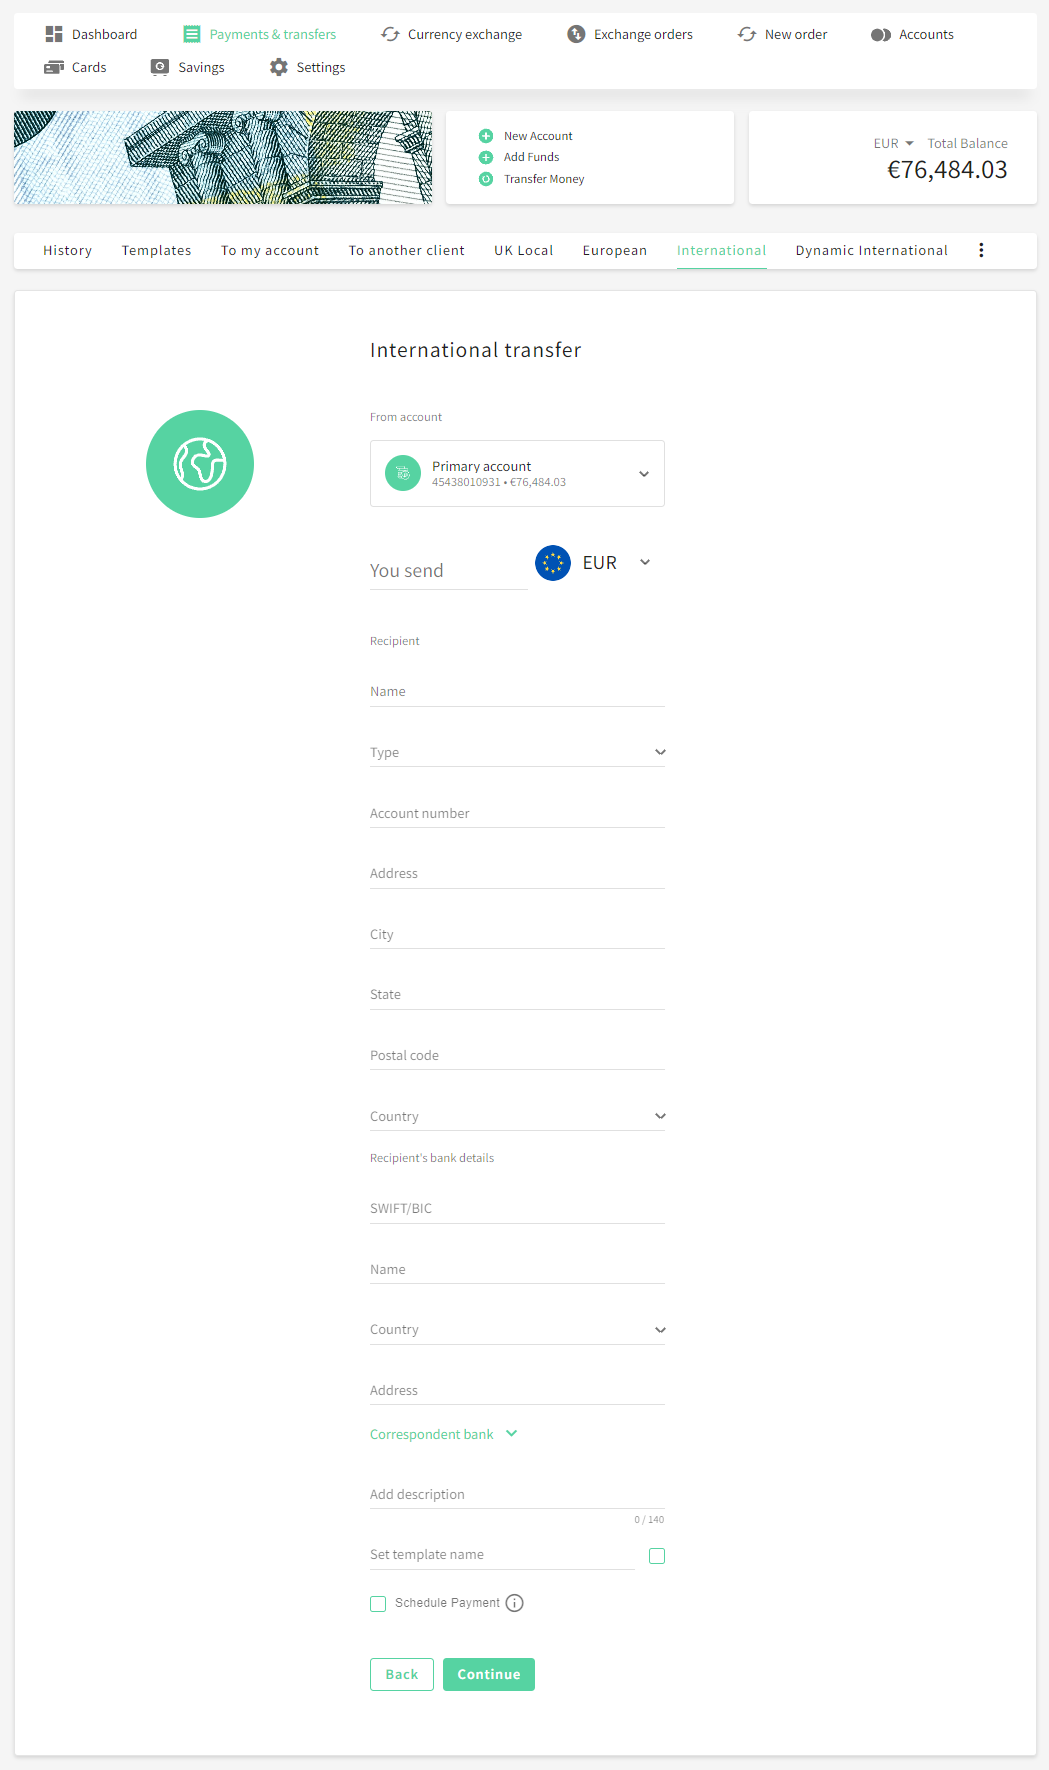
International and Dynamic International
The International and Dynamic International tabs allow the user to execute a transfer to a country outside the EU and UK. The transfer requires the full list of account details, such as the recipient’s name, IBAN, SWIFT, and legal address.
To create an International transfer
-
Navigate to the International or Dynamic International tab.
-
Select an account from the From account drop-down list to transfer funds from.
-
Enter the sum to transfer in the You send field.
-
Select a currency from the drop-down list.
-
Define the following recipient details:
-
Fill in the beneficiary name in the Name field.
-
Select a beneficiary type in the Type field.
-
Beneficiary address details: Address, city, state (if applicable), postal code, and country. The beneficiary and bank postal codes will be validated to correspond to the specified countries.
-
Account details: IBAN.
-
Correspondent bank details (if provided): Name, account number, BIC/SWIFT.
-
-
Add a description of the purpose of the payment. The minimum number of symbols is 6.
-
Set the Schedule payment checkbox to create a recurring payment.
-
Set the Set template name checkbox to save the transfer details as a template.
-
Click Save to confirm the changes.
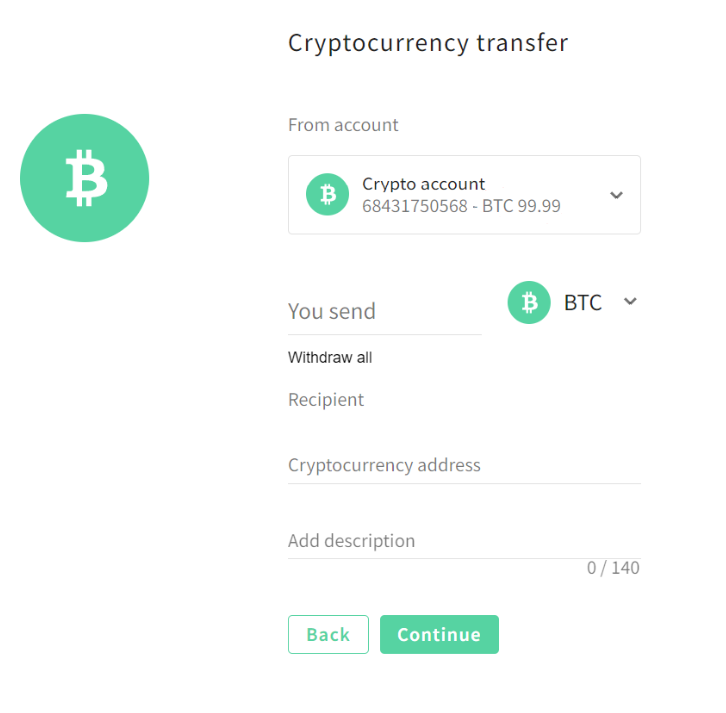
Crypto
The tab allows you to send crypto transfers from an existing crypto account. The transfer requires a crypto wallet address and a recipient’s name.
To create a crypto transfer
-
Navigate to the New order tab.
-
Select an account from the From account drop-down list to transfer funds from.
-
Enter the sum to transfer in the You send field.
-
Select a currency from the drop-down list.
-
Define the beneficiary wallet address in the Cryptocurrency address field.
-
Add a payment description to define its purpose. The minimum number of symbols is 6.
-
Click Save to confirm the changes.
The Withdraw all button allows to withdraw the maximum available amount from the account. Fees are also considered when withdrawing funds from a crypto account; thus, only sums available for withdrawal will be suggested.
Direct debit
The tab provides a comprehensive table with all current direct debit mandates. See Direct debit for additional details on the functionality.
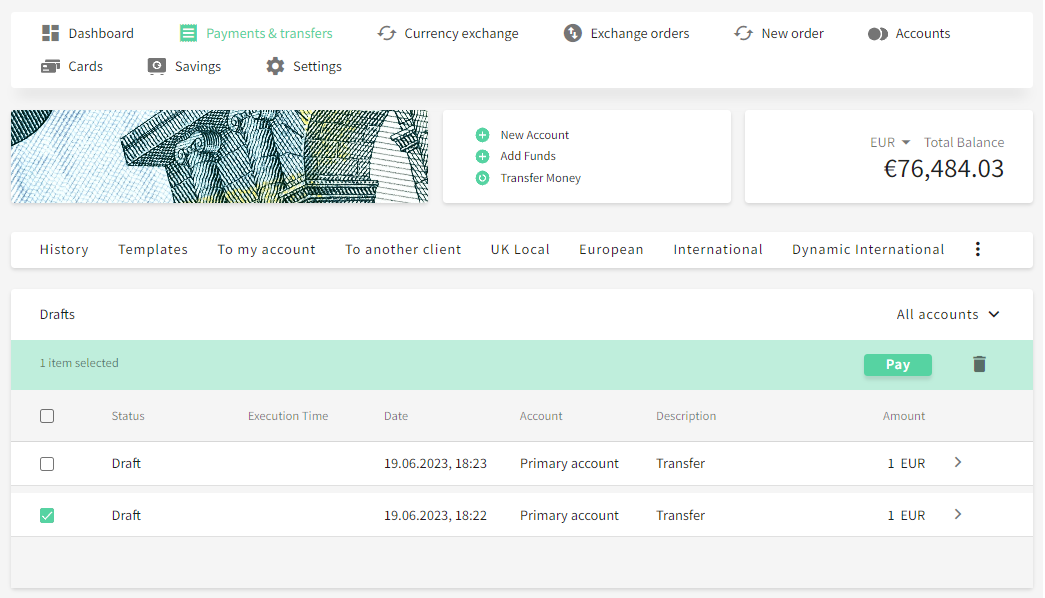
Drafts
The tab contains the details of all unfinished transfers created in the Web Interface. Select a draft and click Pay to initiate the payment.

Advanced options
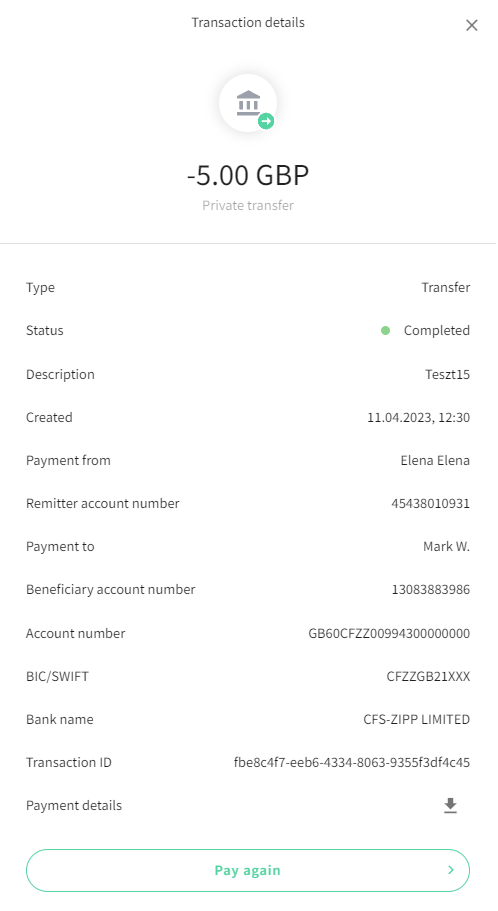
Pay again
The Pay again button allows users to repeat an outgoing transfer without creating a template.
To repeat a payment
-
Navigate to Payments & transfers.
-
Navigate to History to see the list of transactions.
-
Click an outgoing transaction to see its statement.
-
Click Pay again to initiate a payment with the same details.
-
The payment details will be prefilled. Change the sum and add a description if needed.
-
Confirm the payment.
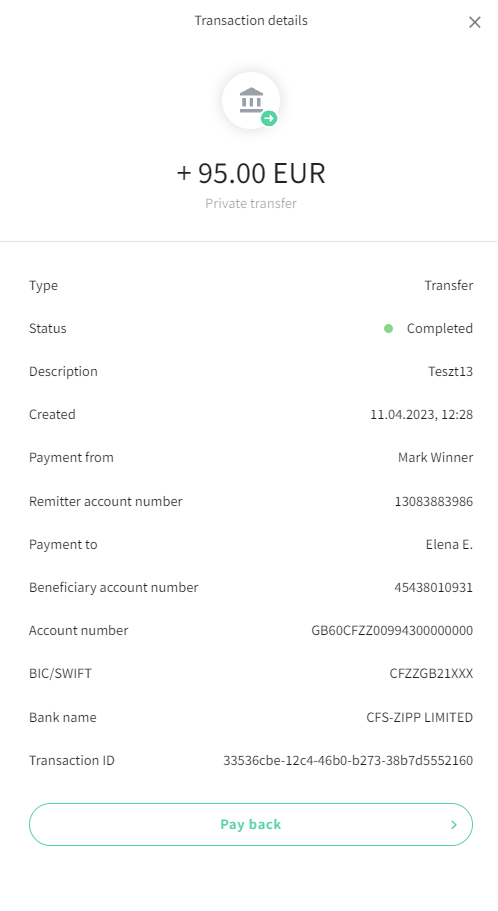
Pay back
The Pay back button allows users to create a “response” payment to an incoming transfer. The feature can be configured by a Feature change request. Follow the steps below to send a payment using the incoming transfer details:
-
Navigate to Payments & transfers.
-
Navigate to History to see the list of transactions.
-
Click an incoming transaction to see its statement.
-
Click Pay back to initiate a payment with the Sender details.
-
The payment details will be prefilled. Change the sum and add a description if needed.
-
Confirm the payment.