Direct debit
Synchronizing mandates via Admin Panel
You can synchronize existing mandates with the Crassula direct debit feature directly via Admin Panel by selecting a corresponding account.
To synchronize existing mandates with Crassula, perform the steps below:
In the Admin Panel, navigate to Banking > Accounts on the left sidebar;
Choose an account for synchronizing direct debit mandates with Crassula;
Click the Sync mandates button in the Action column of the selected account.
The Sync mandates button in the Admin panel is available for the clients with Railsr and ClearBank providers.
Please note that funds are debited even if you don't use the Sync mandates button. This is because the functionality operates on the provider's side, not on Crassula's.
Consider using the Sync mandates button to:
View the complete list of mandates;
Decline a mandate.
You don't need to use the button often, as it doesn't influence the feature's main function.
After syncing mandates, check your account logs to see the updated status.

As a result, the corresponding subscriptions are added to the list of Crassula direct debits under the Banking > Direct Debit Mandates section of the Admin Panel.
Managing mandates in Web and Mobile Interfaces
Both interfaces provide the following capabilities:
View existing direct debits: Users can scroll through a list of all active direct debit mandates that have been successfully set up.
Transaction history: For each direct debit, users can view the history of transactions, including the amount, due date, paid date, and reference number.
Cancel future payments: Users have the option to cancel future payments for any direct debit mandate directly from the interface.
Please note that the direct debit functionality is managed through the configuration file, where it can be enabled or disabled for both the Admin panel and the Web and Mobile Interfaces. For configuration details, contact your manager.
Accessing existing direct debits
Once the functionality is enabled and the direct debit mandates are synchronized with Crassula, navigate to either Payments & transfers > Direct Debits (under the  More options button) in Web Interface or to the Planned tab in Mobile Interface. The Web Interface provides a comprehensive table with all current direct debit mandates, while the Mobile Interface displays not only direct debit items under the Planned tab but also drafts, scheduled, recurring, and other preplanned payments.
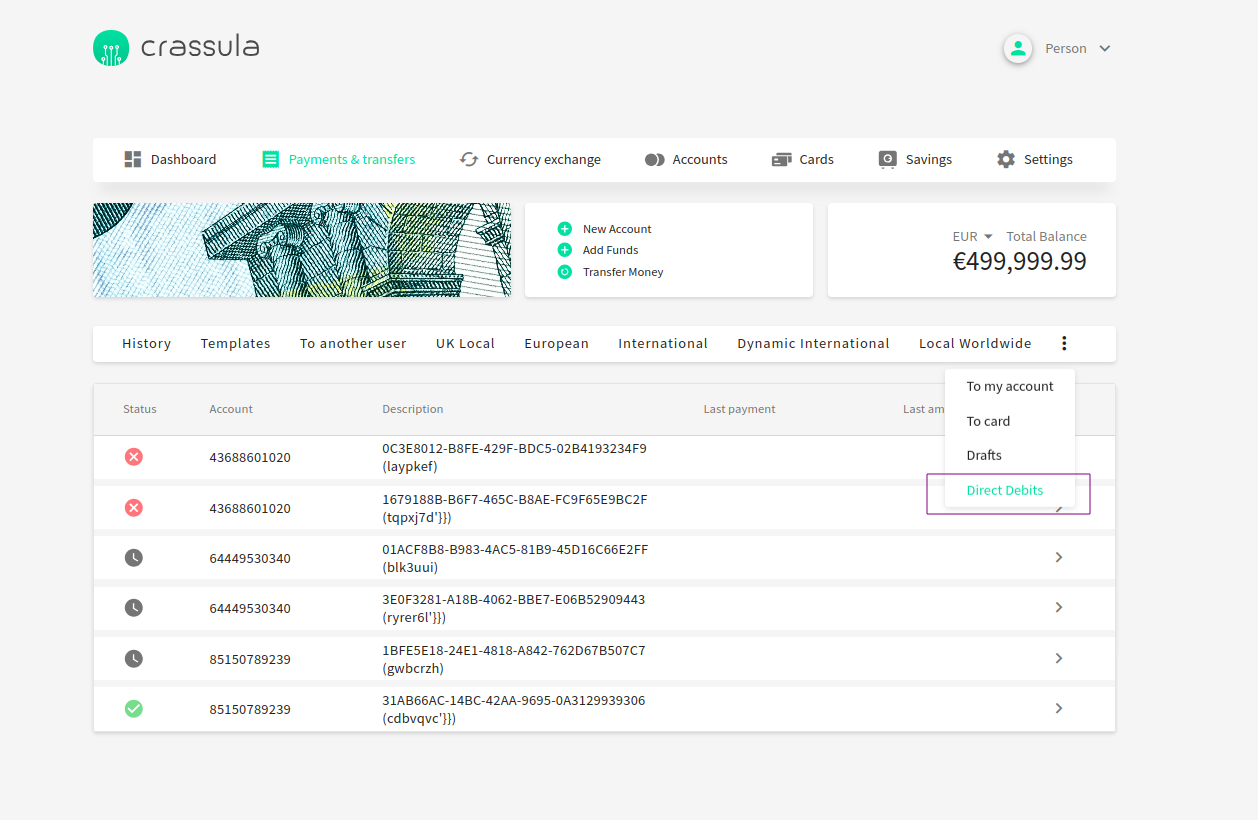
Direct Debits view in Web Interface
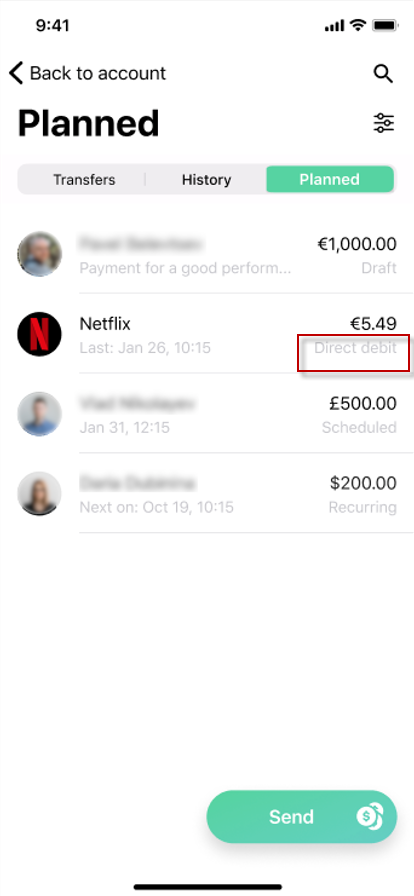
Planned tab in Mobile Interface with a direct debit item
Operation statuses
Each direct debit mandate can be in one of the following three operation statuses:
Active (green tick): The mandate is fully active and functional.
Pending (gray clock): The mandate is undergoing initialization, registration, or awaiting confirmation. It might also be in a transitional state such as waiting for cancellation or an unknown status.
Inactive (red cross): The mandate has been terminated due to cancellation, rejection, completion, or return.
Accessing transaction history
To access the transaction history of a single direct debit mandate, follow these steps based on your interface:
Web Interface:
Navigate to Payments & Transfers > Direct Debits (under the
 More options button).
Locate the direct debit mandate you wish to review in the table.
Click the Details button next to the mandate.
A dialog with all related details will appear, including a See payment history button.
Click the See payment history button to be redirected to the transaction history page.
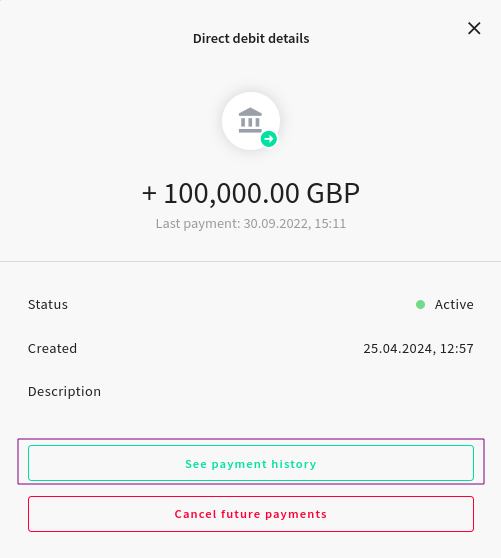
Direct debit details dialog in Web Interface
Mobile Interface:
Navigate to the Planned tab.
Find and tap the direct debit item you wish to review.
A dialog with all related details will appear, including a View transactions button.
Tap the View transactions button to be redirected to the transaction history page.
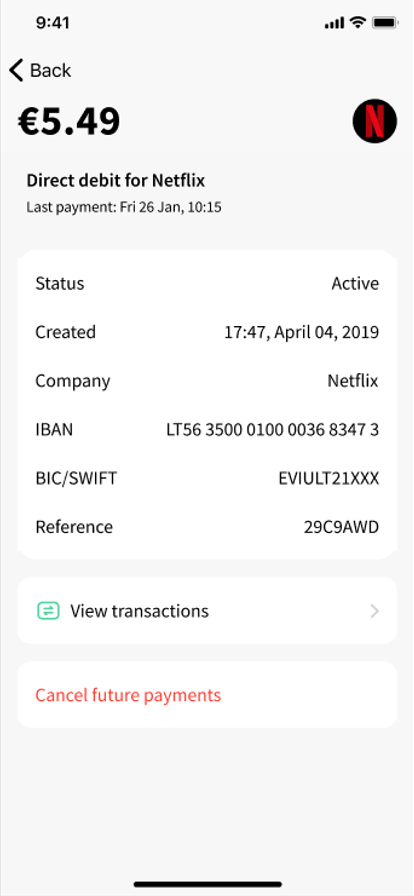
Direct debit details dialog in Mobile Interface
Canceling future payments
To cancel future payments for a direct debit mandate, follow these steps based on your interface:
Web Interface:
Navigate to Payments & Transfers > Direct Debits (under the
 More options button).
Locate the direct debit mandate you wish to manage in the table.
Click the Details button next to the mandate.
A dialog with all related details will appear, including a Cancel future payments button.
Click the Cancel future payments button.
Another dialog will open, prompting you to confirm that you want to cancel future payments.
Confirm the cancellation.
A final dialog will appear, indicating that the cancellation request was successful.
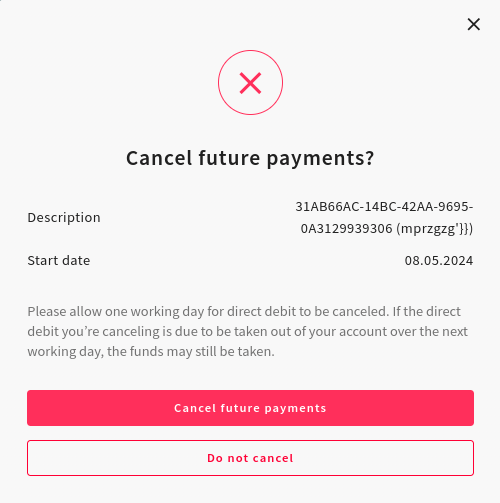
Cancellation dialog in Web Interface
Mobile Interface:
Navigate to the Planned tab.
Find and tap on the direct debit item you wish to manage.
A dialog with all related details will appear, including a Cancel future payments button.
Click the Cancel future payments button.
A dialog will open, prompting you to confirm that you want to cancel future payments.
Confirm the cancellation.
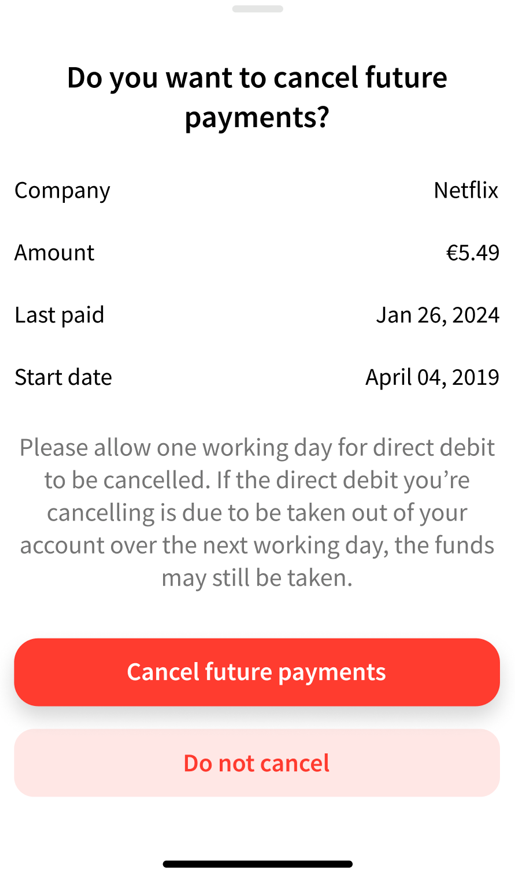
Cancellation dialog in Mobile Interface
Managing mandates programmatically
This section provides general instructions on how to use the Crassula API and CLI commands to manage your direct debit mandates.
The following instructions for the accounts with the ClearBank provider outline a generic workflow, covering the main operations involved in managing direct debit mandates. This aims to provide you with a general understanding of the implemented functionality. As we continue to develop this feature, you can expect more specific examples and more advanced functionalities.
Creating a direct debit mandate
Before you start, make sure that you have an account with the ClearBank provider in real GBP.
To create a direct debit mandate on the Clearbank side, run the following command:
./run bin/console rbk-payments-data:handle-clearbank-mandates create {accountId}Replace
{accountId}with the account number of the newly created account. Please note, this step only creates a mandate on the ClearBank side, not in Crassula.To view the newly created mandates, you can either run the command below or synchronize the mandates in the Admin Panel.
Synchronizing account mandates
To synchronize the account mandates on ClearBank side and in Crassula, run the following command:
./run bin/console rbk-payments-data:handle-clearbank-mandates list {accountId}Replace {accountId} with your account number.
Alternatively, you can achieve the same effect by making the following GET API call:
GET /api/clients/{clientId}/accounts/{accountId}/direct-debit-mandatesCancelling a direct debit mandate
To cancel a mandate, make a POST call to the following endpoint:
POST /api/clients/{clientId}/direct-debit-mandates/{directDebitMandateId}/cancelThe mandate status will change to Waiting For Cancel.
To check if the mandate is cancelled on the ClearBank side, you can use one of the following methods:
Synchronize from the Admin Panel and view the list of direct debit mandates;
Perform an API call or run the command from this step;
Or, use the command below:
CODErbk-payments-data:process-cancelled-mandatesThis command checks if the mandate in status Waiting For Cancel is cancelled on the ClearBank side.
.png)