-
Persons—manage items within the Persons window.
-
Companies—manage items within the Companies window.
-
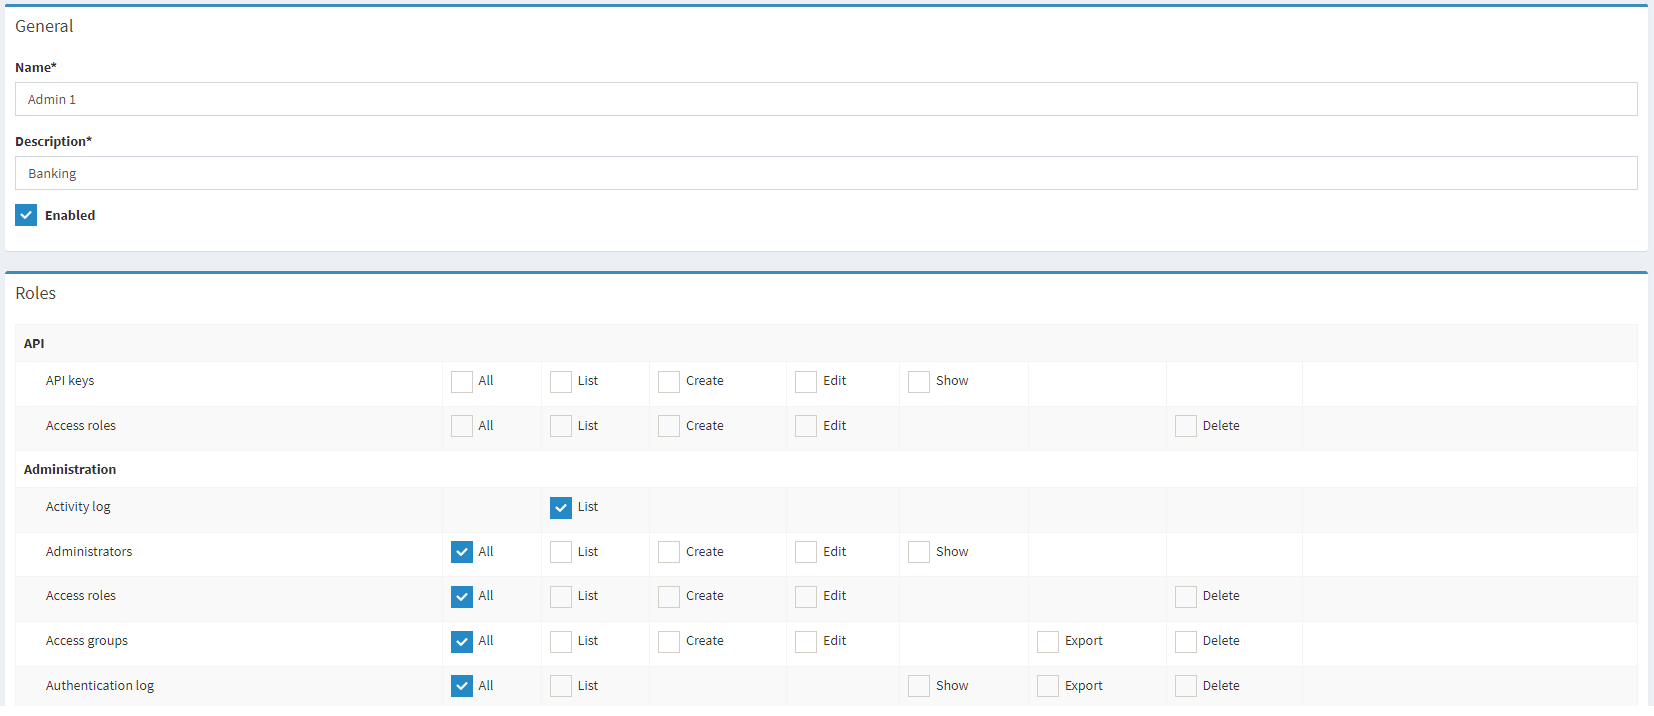
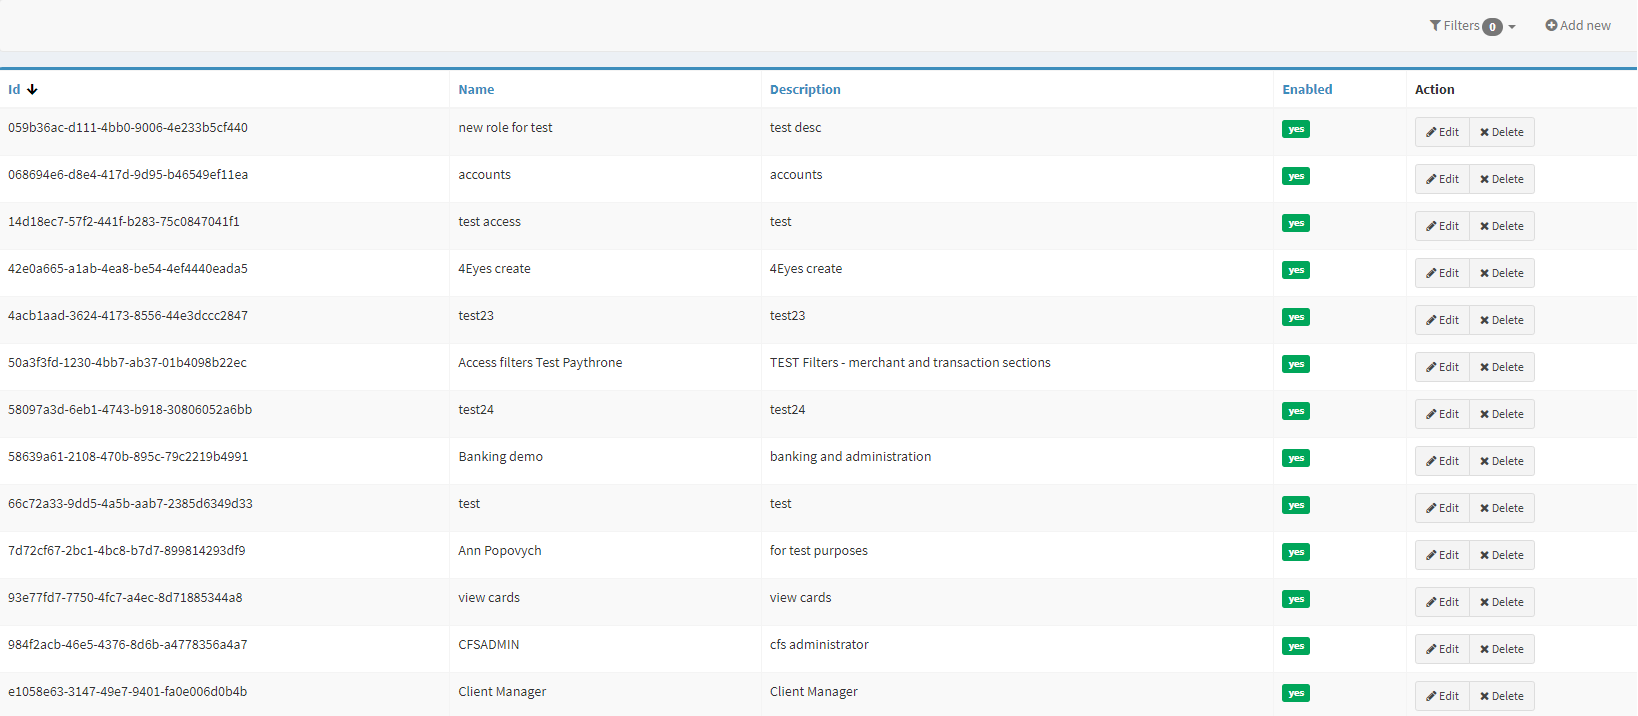
Access roles—manage items within the Access roles window.
-
Company staff—manage items within the Company staff window.
-
Country Groups—manage items within the Country Groups window.
-
Accounts—manage items within the Accounts window.
-
Activate—activate and reactivate accounts. If not set, the action will not be available for the role.
-
Mark As Primary—manage account priority status.
-
Close—terminate accounts (such accounts remain seen in the Crassula system)
-
Iban—generate IBANs for accounts.
-
Update Balance—manually perform internal deposit transactions.
-
Statement—download the detailed list of account transactions.
-
Metadata—access the Metadata tab of the Account details window.
-
Decline—decline opening of an additional account. Additional accounts can be created in the Waiting for approval status if the functionality is enabled in the system configs—the action allows rejection of such accounts. If not set, the action will not be available for the role.
-
Accounts (waiting for approval)—manage items within the Accounts (waiting for approval) window.
-
Activate—activate and reactivate accounts. If not set, the action will not be available for the role.
-
Mark As Primary—manage account priority status.
-
Close—terminate accounts (such accounts remain seen in the Crassula system)
-
Iban—generate IBANs for accounts.
-
Update Balance—manually perform internal deposit transactions.
-
Statement—download the detailed list of account transactions.
-
Metadata—access the Metadata tab of the Account details window.
-
Decline—decline opening of an additional account. Additional accounts can be created in the Waiting for approval status if the functionality is enabled in the system configs—the action allows you to reject such accounts. If not set, the action will not be available for the role.
-
Vaults—manage items within the Vaults window.
-
Activate—activate and reactivate accounts. If not set, the action will not be visible for the role.
-
Mark As Primary—manage account priority status.
-
Close—terminate accounts (such accounts remain seen in the Crassula system)
-
Iban—generate IBANs for accounts.
-
Update Balance—manually perform internal deposit transactions.
-
Statement—download the detailed list of account transactions.
-
Metadata—access the Metadata tab of the Account details window.
-
Decline—decline opening of an additional account. Additional accounts can be created in the Waiting for approval status if the functionality is enabled in the system configs—the action allows you to reject such accounts. If not set, the action will not be available for the role.
-
Saved top-up cards—manage items within the Saved top-up cards window.
-
Transactions—manage items within the Transactions window.
-
Process—approve recall transactions.
-
State—manually change transaction state.
-
Resolve—approve or reject lock-up transactions. The functionality of lock-up transactions is available only for the Railsr service provider. If not set, the action will not be available for the role.
-
Refund—return funds to the account. If not set, the action will not be visible for the role.
-
Recall—revoke a refunded transaction.
-
Cancel—decline the transaction execution. If not set, the action will not be visible for the role.
-
Set Beneficiary—change beneficiary details in the Edit mode.
-
Sync Status—synchronize transaction statuses between the Admin Panel and service provider. If not set, the action will not be visible for the role.
-
Transactions (pre-approval)—manage items within the Transactions (pre-approval) window.
-
Process—approve recall transactions.
-
State—manually change transaction state.
-
Resolve—approve or reject lock-up transactions. The functionality of lock-up transactions is available only for the Railsr service provider. If not set, the action will not be available for the role.
-
Refund—return funds to the account. If not set, the action will not be visible for the role.
-
Recall—revoke a refunded transaction.
-
Cancel—decline the transaction execution. If not set, the action will not be visible for the role.
-
Set Beneficiary—change beneficiary details in the Edit mode.
-
Transactions (action required)—manage items within the Transactions (action required) window.
-
Process—approve recall transactions.
-
State—manually change transaction state.
-
Resolve—approve or reject lock-up transactions. The functionality of lock-up transactions is available only for the Railsr service provider. If not set, the action will not be available for the role.
-
Refund—return funds to the account. If not set, the action will not be visible for the role.
-
Recall—revoke a refunded transaction.
-
Cancel—decline the transaction execution. If not set, the action will not be visible for the role.
-
Set Beneficiary—change beneficiary details in the Edit mode.
-
Transactions (undetermined)—manage items within the Transactions (undetermined) window.
-
Process—approve recall transactions.
-
State—manually change transaction state.
-
Resolve—approve or reject lock-up transactions. The functionality of lock-up transactions is available only for the Railsr service provider. If not set, the action will not be available for the role.
-
Refund—return funds to the account. If not set, the action will not be visible for the role.
-
Recall—revoke a refunded transaction.
-
Cancel—decline the transaction execution. If not set, the action will not be visible for the role.
-
Set Beneficiary—change beneficiary details in the Edit mode.
-
Identification requests—manage items within the Identification requests window.
-
Zip—download the request details as an archive. If not set, the Download action will not be visible for the role.
-
Approve—change the identification request status to Approved. If not set, the action will not be visible for the role.
-
Reject—change the identification request status to Rejected. If not set, the action will not be visible for the role.
-
Reject Finally—permanently change the identification request status to Rejected. If not set, the action will not be visible for the role.
-
Expiring documents—manage items within the Expiring documents window.
-
Price lists—manage items within the Price lists window.
-
Publish—activate price lists. If not set, the action will not be visible for the role.
-
Disable—deactivate price lists. If not set, the action will not be visible for the role.
-
Clone—create a copy of a price list. If not set, the action will not be visible for the role.
-
PEP & sanctions—manage items within the PEP & sanctions window.
-
Limits—manage items within the Limits window.
-
Triggered limits—manage items within the Triggered limits window.
-
Application forms—manage items within the Application forms window.
-
Client application forms—manage items within the Client application forms window.
-
Answers—access the answers provided by clients.
-
Approve—verify and finalize the answers.
-
Decline—reject the answers.
-
Request—repeat the request.
-
Batch payments—manage items within the Batch payments window.
-
Start—launch the batch payment. If not set, the action will not be visible for the role.
-
Continue—resume batch payment processing in case of iteration parts being declined.
-
Cancel—delete the batch payment.
-
File Example—download CSV and XLS file examples.
-
Issues—manage items within the Issues window.
-
Approve—approve the resolution of an issue.
-
Reject—approve the resolution of an issue.
-
Request Update—request the resolution status.
-
Assign To Me—set the current Admin profile as the issue assignee.
-
Clients—access the list of active clients in all the client-related fields. If not set, client names will not be suggested in a drop-down list when filling Client or Name/Surname fields.
-
Show Client—access the extended list of details.
-
List in reports filter—access active clients as a drop-down list when configuring report filters in the Reports section of the Admin Panel. The List action must be set to true.
-
Client notes—manage items within the Notes tab of the Person and Company profiles.
-
Provider numbers—manage provider details within the Persons and Companies windows.
-
Transactions (outgoing)—manage outgoing transactions available in Person and Company profiles.
-
Client Documents—manage items within the Documents tab of the Person and Company profiles.
-
Approve—approve documents attached to client profiles within the Documents tab of the Person and Company profile details.
-
Reject—decline documents attached to client profiles within the Documents tab of the Person and Company profile details.
-
Download—import documents attached to client profiles within the Documents tab of the Person and Company profile details.
-
Fees—manage items within the Transfer fees tab of the Price lists window.
-
Issued Card Fees—manage items within the Issued card fees tab of the Price lists window.
-
Recurring fees—manage items within the Recurring fees tab of the Price lists window.
-
FX Markup Fees—manage items within the FX markup fees tab of the Price lists window.
-
Cashback—manage items within the Cashback tab of the Price lists window.
-
VaultRates—manage items within the Vault rates tab of the Price lists window.
-
Change Verification Level Fees—manage items within the Change verification level fees tab of the Price lists window.
-
Change Person Subscription Plan Fees—manage Price list rules for subscriptions of the Person type.
-
Change Company Subscription Plan Fees—manage Price list rules for subscriptions of the Company type.
-
Two-factor auth methods—manage items within the Two-factor auth methods tab of Person profiles.
-
Company clients—manage items within the Clients tab of the Company profiles.
-
Client legal agreements—manage items within the Legal agreements tab of the Person and Company profiles.
-
Client account provider configuration—manage account providers within the Persons and Companies windows.
-
Application form questions—manage questions within the Application forms window.
-
Application form question option—manage question options within the Application forms window.
-
Application form answers—manage answers within the Client application forms window.
-
Batch payment iteration—manage items within the Batch payment requests tab of the Batch payments window.
-
Batch payment recipient—manage items within the Recipients tab of the Batch payments window.
-
Tags—manage tags available in Person and Company profiles.
.png)