Emergency shutdown
The functionality is under development and is subject to change.
Opening the item
Follow the steps below to access the list of emergency switches:
Navigate to the Admin Panel.
Click Administration on the left sidebar.
Go to the Emergency Shutdown menu item.
How to create an emergency switch
Only one emergency switch can be created per transfer type:
All payments: No payments are allowed when the switch is active.
Outgoing payments: No outgoing payments are allowed when the switch is active.
Incoming payments: No incoming payments are allowed when the switch is active.
Currently, the functionality is available for outgoing payments only. If an emergency switch is created for all payments, it will cover only outgoing transactions.
To create an emergency switch:
Navigate to the Emergency Shutdown menu item of the Admin Panel.
Click Add new in the top-right corner.
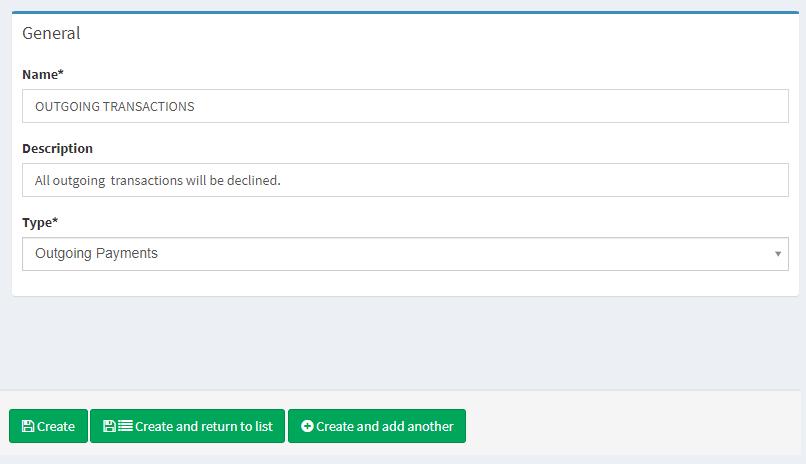
Set a name for the new emergency switch in the Name field.
Add a description for administrators in the Description field. The field is optional and will be visible only in the Edit and Show modes.
Select one of the transfer types from the Type drop-down menu.
Click Save to confirm the changes. The new switch will be available in the list of emergency switches.

New emergency switch
How to enable an emergency switch
To enable an emergency switch:
Navigate to the Emergency Shutdown menu item of the Admin Panel.
Find the necessary emergency switch that corresponds to the required transfer type.
Click Switch to activate the restriction.
Once the business issue is solved, click Switch again to disable the restriction.
Navigate to the Workflow section for additional details on payments.

Component parameters

Parameter | Description |
|---|---|
Name | The name of an emergency switch. |
Type | The parameter defines which payment type is restricted when the switch is enabled:
Currently, the functionality is available for outgoing payments only. If an emergency switch is created for all payments, it will cover only outgoing transactions. |
Active | Defines whether the restriction is currently active. |
Created at | Date and time of creation. |
Action | The following action buttons are available:
|
Workflow
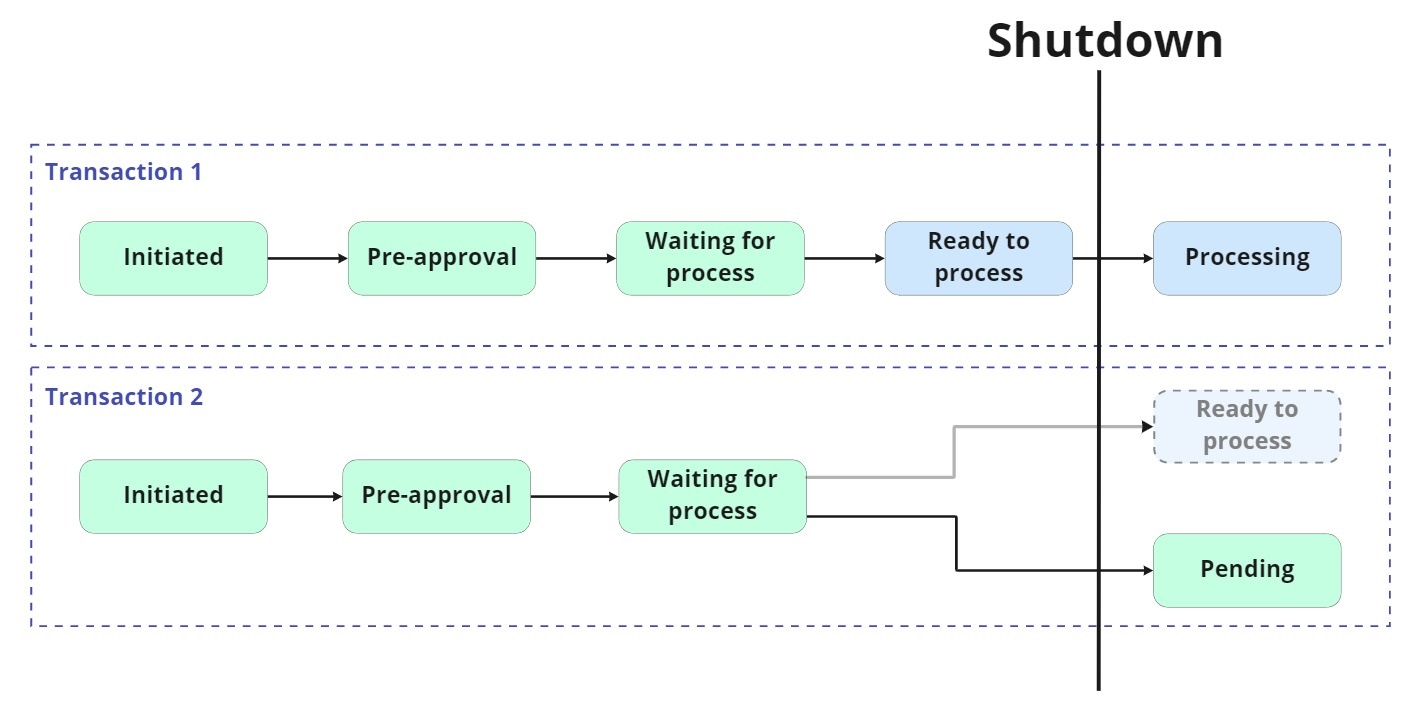
Under enabled restrictions, the workflow depends on whether the transaction is sent to the service provider for processing, i.e., the transaction status is Ready to process or later. Thus, if transaction processing is complete on the Crassula side, the payment will be processed according to the standard procedure. See the following chart for additional description:

Pending transactions
Transactions that have not been sent to the service provider before the shutdown is enabled remain Pending. Pending transactions must be resent manually after the shutdown is disabled.
To resend a pending transaction after shutdown:
Navigate to the Transactions menu item of the Admin Panel.
Find a pending transaction with the Resume button available.
Click Resume.
The transaction will be processed according to the standard procedure.
.png)