.png)
Banking Mobile Interface
Banking Mobile Interface is a mobile app that provides access to essential Banking services, starting from account opening and ending in exchanging cryptocurrencies. The following guide leads the user through the basics of Banking Mobile Interface and provides instructions on the actions available.
The app is available for iOS and Android devices, while the guide demonstrates the iOS version.
The Mobile Interface design varies depending on the visual solutions of the White Label providing the service. Nevertheless, the interface structure and functionality are implemented according to the following guide.
Overview
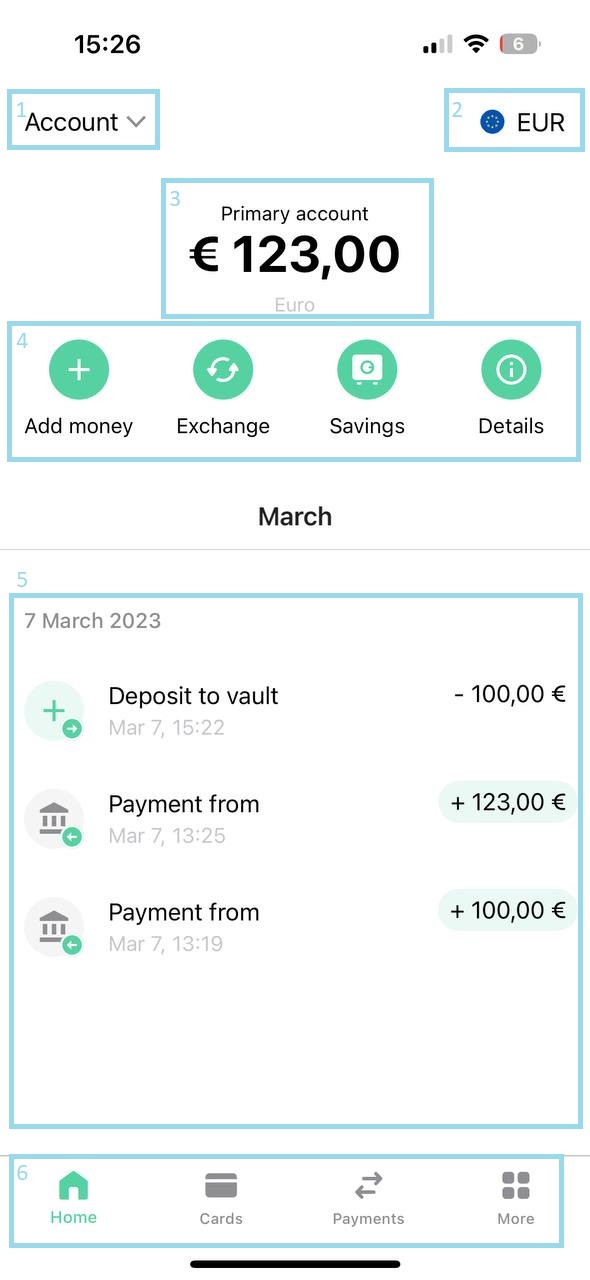
The Mobile Interface consists of several functionality fields that provide quick access to all the necessary details of your accounts in <White Label>. See the image below to navigate across the interface:
The Account tab provides the details on all accounts opened by the user and defines the default account. Every time you select an account from the list and access its details, the account is considered to be default and is shown on the Home page.
The default currency used to calculate total amounts.
The Balance field demonstrates the sum of funds on the default account.
The Quick Access field includes the most frequently used actions: topping up, currency exchange, savings, and default account details.
The Transaction History demonstrates recent transactions in the default account, including transfers, fees, and card transactions.
The Navigation sidebar is the main navigation instrument to switch between Mobile Interface functionalities.
Signing up
An existing profile is required to have access to all the Mobile Interface functions. Follow the steps below if you have not registered yet:
Open the <White Label> app.
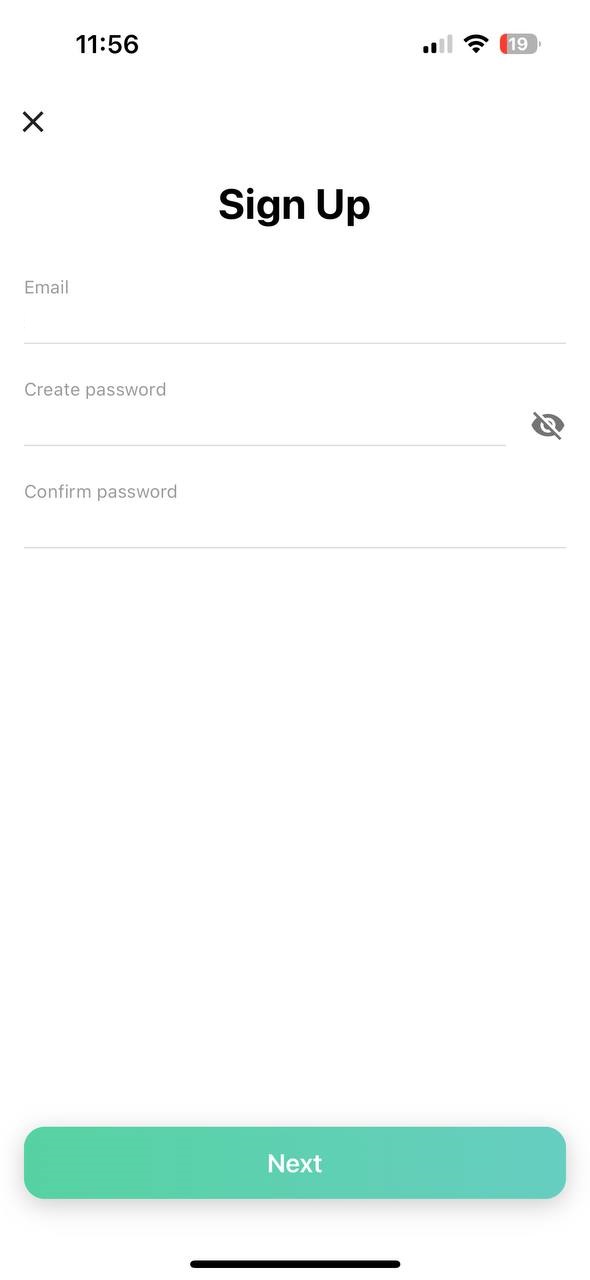
Click Sign Up to start creating your profile.
Fill in your email and set a password, and click Next.
Fill in your personal details and click Continue.
Acquaint yourself with the Terms and Conditions and confirm them by enabling the corresponding tumbler.
Click Create account.
Your profile is successfully created, and the Primary account is opened automatically.
Check your email for the identification link provided by the service. Follow the instructions to verify your email address.
Once your email is verified, you will be navigated to a phone verification link. Enter the verification code sent to your phone to verify your contacts.
Navigate to the document verification page to upload an ID document.
Complete the questionnaire (optional).
Wait for the document approval (takes up to several minutes).
Once the document approval is complete, the primary account is activated.
Navigate back to the <White Label> app to log in using the newly created credentials.
Signing up
Signing in
To sign in for the first time
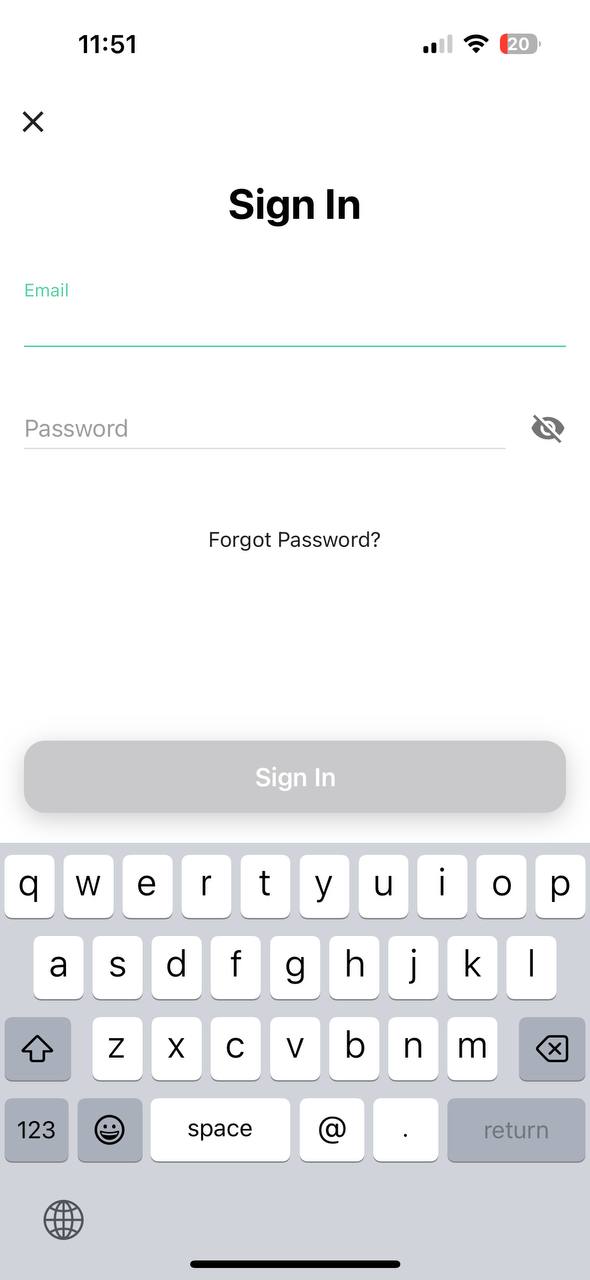
Open the <White Label> app.
Fill in your credentials for authorization.
Set a passcode to access the app.
Enable biometric authorization. It is also possible to do it later in the Security section.
The Mobile Interface will be opened.
All further authorizations will require only your passcode or biometrics unless you log out of the app.
To recover your password
Click Forgot Password? below the Sign-in form. The password recovery window will be opened.
Enter your email address and click Reset.
The password recovery email will be sent to your email. Follow the instructions to reset your password.
Navigate back to the <White Label> app and log in using the updated credentials.
Signing in
Settings
Navigate to the More tab in the Navigation bar to manage your profile details.
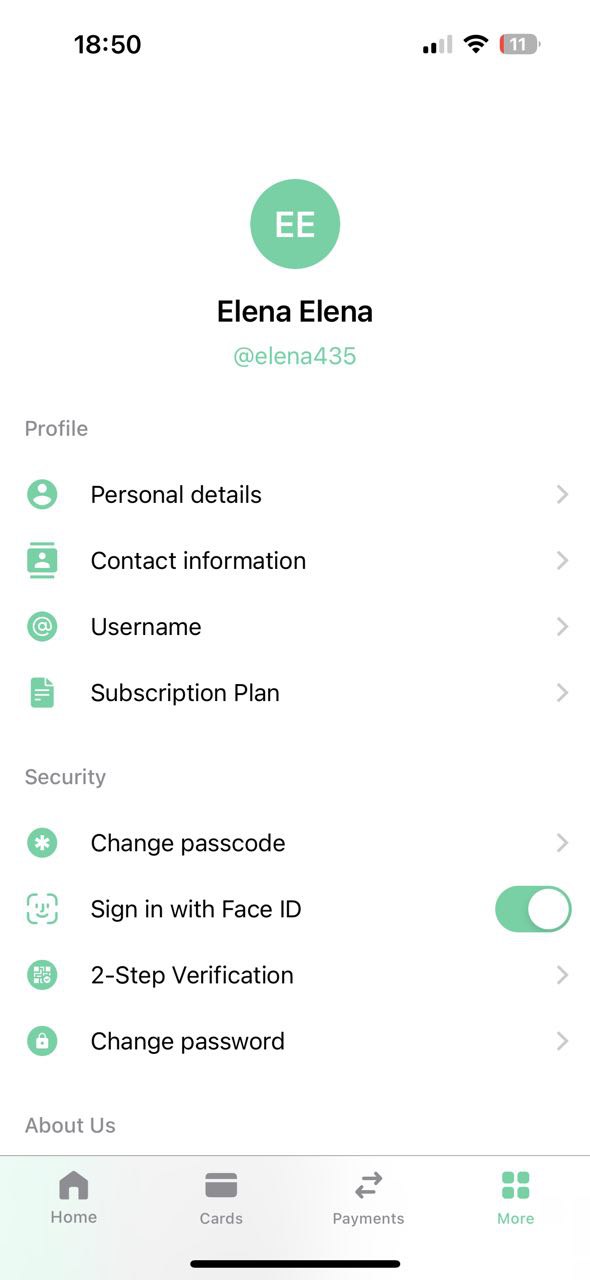 |  |
Profile
The Profile section provides general information on your profile, including the following:
Personal details: Edit your address, though all the new information is to be verified by additional documents.
Contact information: Edit your contact details, though all the new information is to be verified.
Username: Set a username to receive funds using internal transfers without revealing your account number.
Subscription plan: Upgrade and downgrade your subscription to manage pricing rules for the banking service.
Documents (optional): Import your documents, send them for verification, and access the previously uploaded documents.
Fees (optional): Access the pricing rules applied to your profile if available.
Security
The Security section provides a convenient way to set additional means of your profile protection:
Change passcode: Change your profile passcode. The current passcode is required.
Sign in with Touch/Face ID: Click the tumbler to turn on/off biometric authorization.
2-step Verification: Enable additional means of profile protection that include the following (only active clients can change their 2FA details):
Text message: Confirm app activity using codes sent as text messages to your mobile phone.
Authenticator app: Confirm app activity using either Google Authenticator or Authy.
Change password: change your profile password. The current password is required.
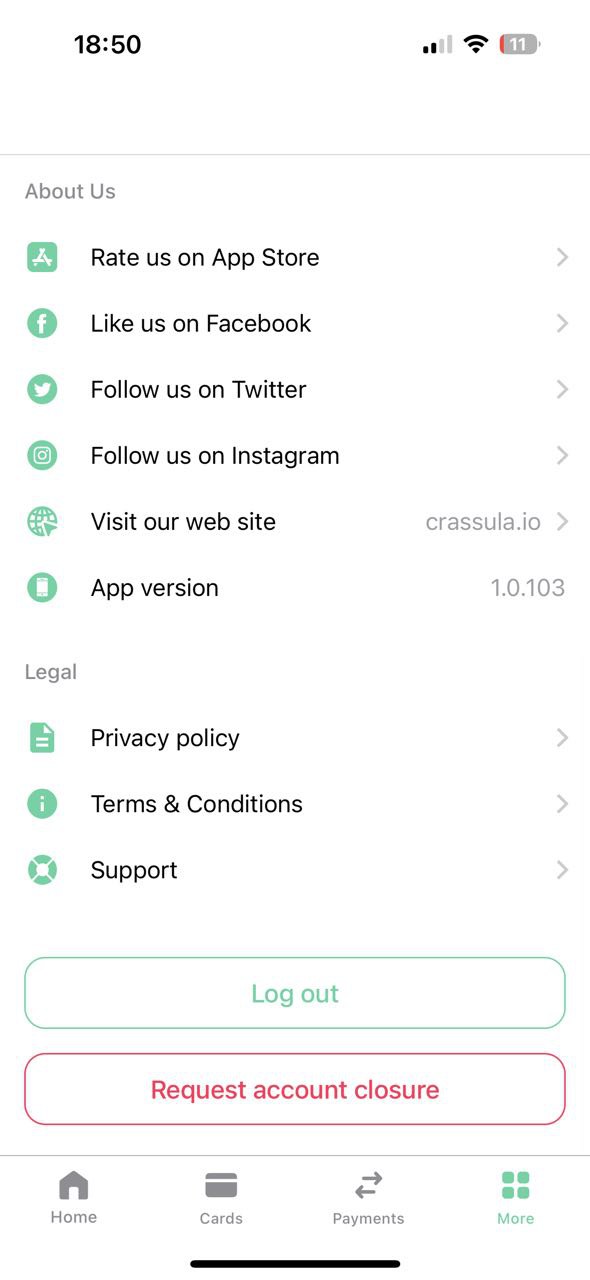
About us
The About us field provides links to <White Label> social media. Subscribe not to miss new features.
Legal
The Legal section provides the following:
<White Label> legal documents.
Support center.