.png)
Overview
Tiers provide a structured way to manage client verification levels and the benefits tied to each level. This includes setting transactional limits, geographic availability, and fees for identity verification.
The system supports fully customizable tier structures, whether for regulatory compliance, feature access control, or progressive pricing models. You can customize tiers to define how clients are onboarded, what actions they can take, and under what conditions.
Tiers also support dynamic upgrade logic, helping automate the client journey while maintaining control over risk and compliance thresholds.
The functionality operates as follows:
-
A new Tier level is created in the Dictionaries section. The Tier level defines a client subtype that will be used for further configuration.
-
A new Limit is created for the corresponding client subtype.
-
Once a Tier is created, it becomes available for selection in the Web Interface.
-
The client selects a Tier level from the list of suggested options and pays the transition fee. Further recurring payments will be charged according to the client’s price list.
-
The Tier label and a corresponding client subtype are assigned to the client’s profile in the Admin panel.
-
The new set of limits is assigned to the client. Further transactions will be processed according to the new rules.
-
The client can change their Tier level to another one from the Web Interface. Once the transition fee is charged, their limits will be updated according to the new subtype.
Related pages
How to add a new Tier level
The process of configuring a Tier level consists of the following steps:
-
Creating a Tier level in the Dictionaries section.
-
Creating a limit for the Tier level.
-
Adding a Changing verification level fee to the existing price lists.
-
Assign a limit to the Tier level.
To create a new Tier level
-
Navigate to the Dictionary menu item.
-
The list of active dictionaries will be opened.
-
Click Add New in the top-right corner of the tab.
-
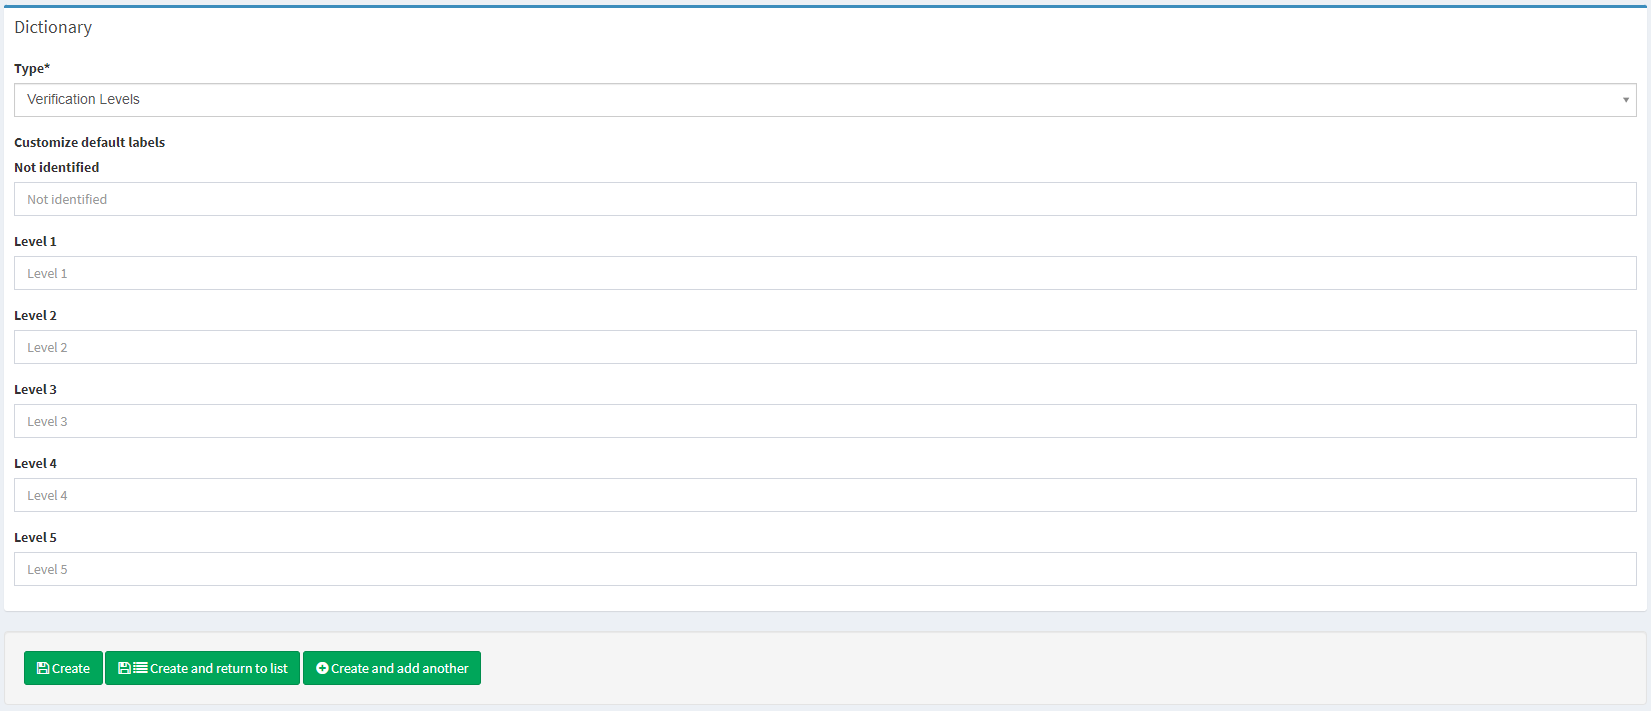
Set the Type parameter to Verification level. The dictionary type is used to set custom verification level names that can be selected by clients for upgrade/downgrade.
-
Customize default labels. The verification level dictionary is labeled per level. If levels are not labeled, default names will be used. API values for each label will correspond to the default Level 1-5 values.
-
Click Create to save the new Dictionary. The labels will be available in client profiles.
How to create a Limit
To create a Limit
-
Navigate to the Limits tab.
-
Click Add New in the top-right corner.
-
Select a Client Verification Level to set the limit for, see Identification requests for details. The parameter can also be used to define a Tier level for the limit.
-
Select a Client Type.
-
Select a Person type or Company type depending on the client type selected in the previous step. The field is optional and can be used to narrow down the list of clients the limit should be applied to At least one dictionary must be configured. See Dictionary for details.
-
Type in the limit name in the Name field.
-
Add a description in the Description field.
-
The limit status is Active by default. Disable the limit if you do not need it active once it is created.
-
Click Add New to add a threshold for transactions or transfers.
-
Fill in the Thresholds details (See the Configuring the component section for parameters required for threshold configuration).
-
Click Create to confirm the limit initiation.
Assignment priorities
The created limit is assigned to clients automatically according to the following priority parameters from highest to lowest:
-
Client type: Person or Company.
-
Client subtype: Tier levels defined in Dictionaries.
-
Client verification level.
The verification level correlates with the client identification stage:
-
Level 0 (not verified)
-
Level 1 (email and phone number verified)
-
Level 2 ( email, phone number, and documents verified by Sumsub service provider)
-
Level 3 (the level is set manually if an additional verification level is required, for example, address verification)
-
Level 4 (the level is set manually if an additional verification level is required, for example, proof of funds)
-
Level 5 (custom requirements that can be used to extend the limits provided; the functionality can be enabled in the system configs).
-
Transactions are restricted for Level 0 and Level 1. Such transactions remain on hold until the user goes through the KYC process.
-
If there is no limit defined for a verification level, the system will consider the limit of a lower level as active. For example, if a limit configuration is missing for the Verification Level 2, the limit of the Verification Level 1 will be applied by default.
-
If a limit is crossed by a personal threshold, the one with lower values will be considered for a corresponding profile.
How to create a fee for changing verification levels
The Change verification level fee tab, available in the top sidebar of a price list, allows browsing and adding new rules to the price list, such as the following:
-
Fees for upgrading a verification level
-
Fees for downgrading a verification level
The functionality is implemented to charge clients when they switch their Tier level via the Web Interface, including upgrades to a custom verification level with extended limits.
To create a fee for changing verification levels
-
Navigate to the Price lists tab in the Banking sidebar.
-
The list of price lists will be opened.
-
Select a price list with a Person/Company type option selected and click Edit.
-
The price list details window will be opened.
-
Navigate to Change verification level fees in the top sidebar.
-
Click Add New in the top-right corner.
-
The Price list field value will be automatically filled with the current price list name. If necessary, change a price list for the rule:
-
Click List next to the price List field.
-
Select a price list from the arisen menu.
-
-
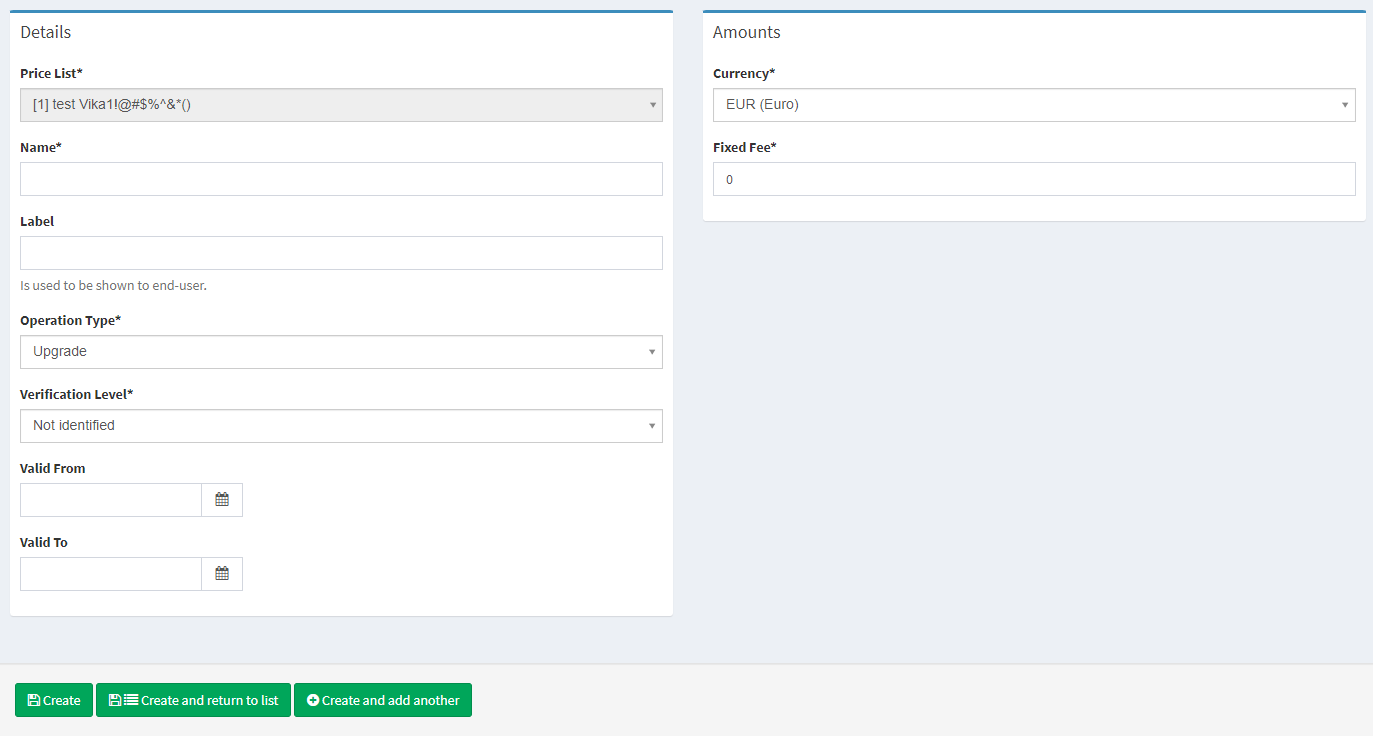
Fill in the Details form. Fields with an asterisk (*) are mandatory.
-
Set a fee name in the Name field. The name should be identical to the Tier level name set in its Label field. See Tiers for details.
-
Optionally, set the Label field to define the name of the fee in Web and Mobile Interfaces.
-
Click the Operation type field to define whether the fee rule should be applied to upgrades or downgrades.
-
Select the target verification level from the Verification level drop-down menu. The fee will be charged when switching to the selected level.
-
Set the Valid from and Valid to parameters to define the rule validity period.
-
-
Fill in the Amounts form. Fields with an asterisk (*) are mandatory.
-
Set the Currency field to define the fee currency. It is recommended to select the default currency allowed by the service provider
-
Set the Fixed fee to define the fixed rate. The fixed amount will be charged once the selected verification level is upgraded (or downgraded).
-
-
Click Create to save the rule parameters. The rule will be added to the price list. Create more fee rules with different verification levels and operation types.
How to assign a limit
Tier limits are automatically assigned to subscribed users if the following conditions are met:
-
Each Tier level is provided with a limit.
-
Client profiles are provided with a Tier label. The label is set automatically once the client upgrades/downgrades their Tier level.
-
The Client subtype parameter is set for every related limit.
-
The Change verification level fee is configured.
There must be no personal limits configured in client profiles. Personal limits are of higher priority and cannot be ignored. It is recommended to avoid personal configuration when working with Tiers.